
Responding to tender opportunities on Ariba Discovery
Article-15424
To conduct business with the Government of Canada, businesses are required to respond to tender opportunities, which is a bidding process where those responding need to demonstrate their ability and capability of meeting the predetermined requirements to be granted the opportunity to provide goods or services to the Government of Canada. Through the transition to CanadaBuys, tender opportunities will be posted on Ariba Discovery, the SAP Ariba platform being used by the Government of Canada for procurement. As we onboard our categories of goods and service to SAP Ariba, postings will be available on both CanadaBuys and Ariba Discovery. Please note, to respond to a Government of Canada tender opportunity found on Ariba Discovery, you require an existing, registered account on the SAP Business Network. If you haven’t already done so, please refer to the guide on how to register.
This guide covers how to respond to a tender opportunity as a vendor (supplier) on the SAP Business Network. The example provided below describes how to respond to a Request for Proposal (RFP), however, the steps in this guide can be translated to other relevant tender opportunities.
Step 1
Enter your credentials (username and password) to access your business profile on SAP Ariba. Once you have entered your credentials, click “Login” to proceed. If you clicked on the opportunity from another website, proceed to Step 6.

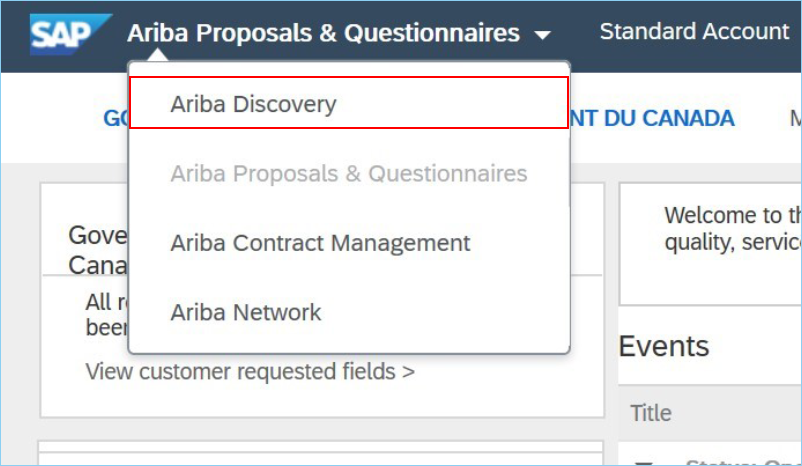
Step 2
After successfully entering your login credentials, click on the “Ariba Proposals & Questionnaires” drop-down arrow on the top-left hand of your browser page and select “Ariba Discovery” from the drop-down menu.
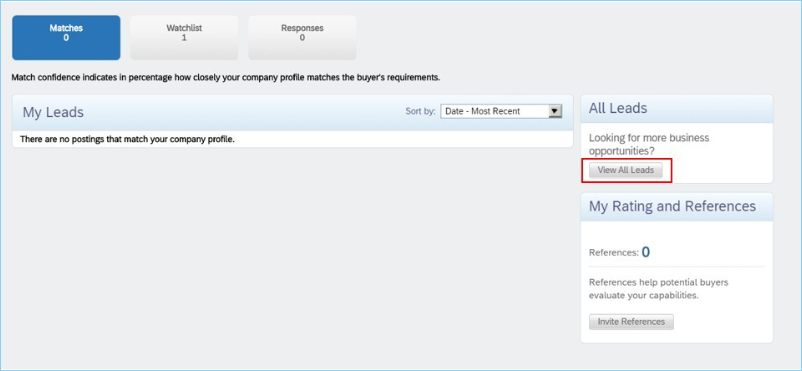
Step 3
After selecting “Ariba Discovery”, you will arrive on the Ariba Discovery homepage to search for opportunities. Click “View All Leads” on the right side of the browser page to proceed.
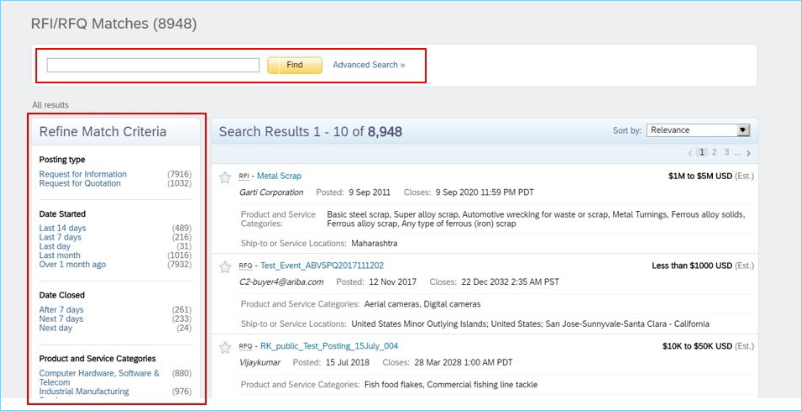
Step 4
You can search for and review tender opportunities in two ways:
- If you know the document ID for the tender opportunity, you can enter it in the search bar located at the top-left of your browser page and click “Find”
- You can also search using keywords with the search bar and apply filters to refine match criteria (for example, type of posting, date posted, product and service categories, price range)
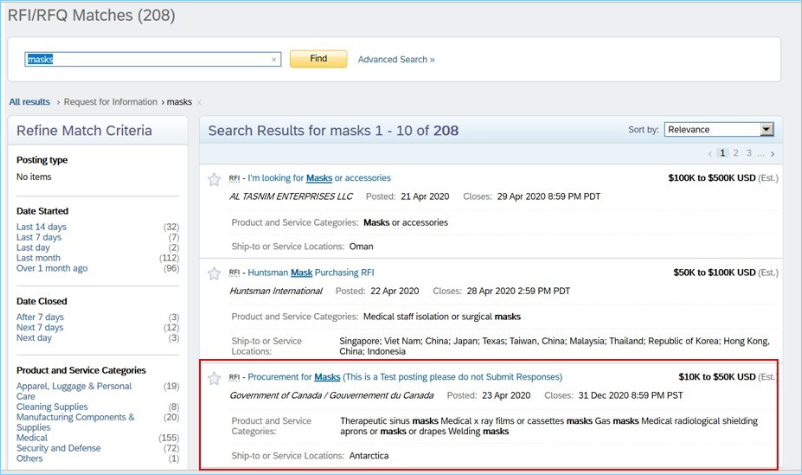
Step 5
Your search results will appear on the page. Once you have located the opportunity you want to respond to, click on the hyperlinked title of the tender opportunity to proceed.
Step 6
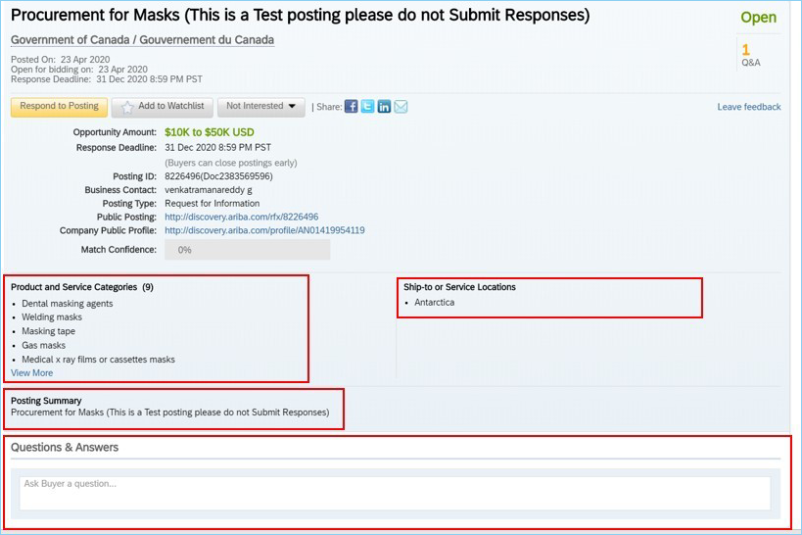
After selecting the opportunity, you will arrive on the main page of the Ariba Discovery posting with some basic information on:
- The product and service categories being sought
- Shipping and/or service locations
- A summary of the posting
- A section to ask questions.
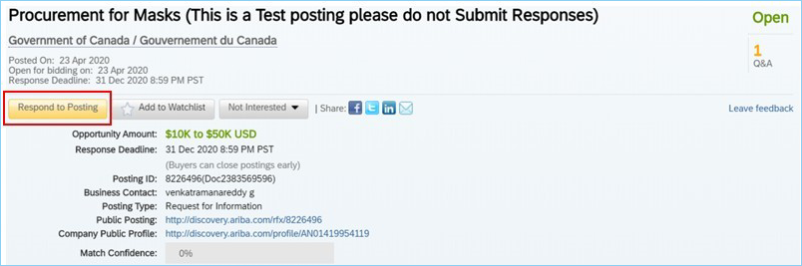
Step 7
Once you have reviewed all the information on the posting, click “Respond to Posting” to begin drafting your response.
Note: If you arrive on the posting through a link on CanadaBuys.canada.ca, by clicking on “Respond to Posting,” you will be prompted to log in to your SAP Ariba account (Step 8). If you have already logged in, you can proceed to Step 9.
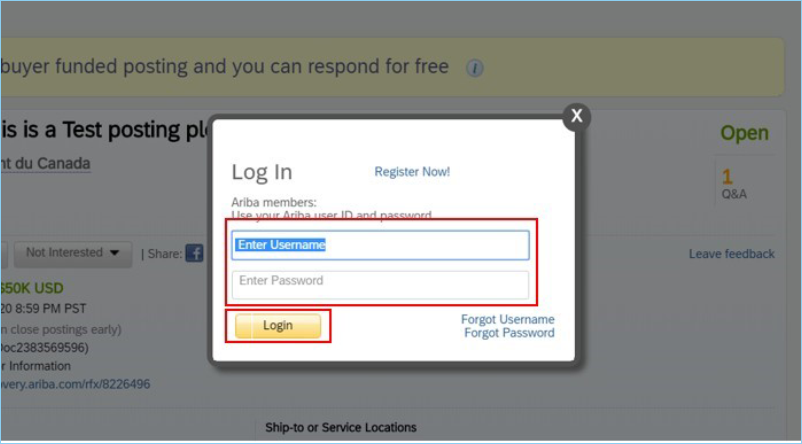
Step 8
If you have not yet logged in to your SAP Ariba account, you will be prompted to log in with your username and password. Enter your username and password and click “Login” to go directly to the tender opportunity, also known as an “Event.”
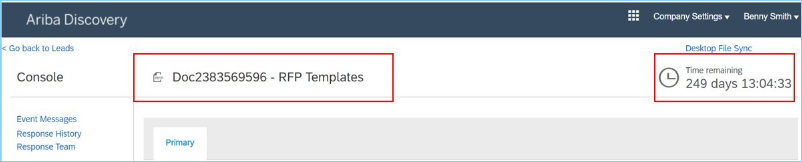
Step 9
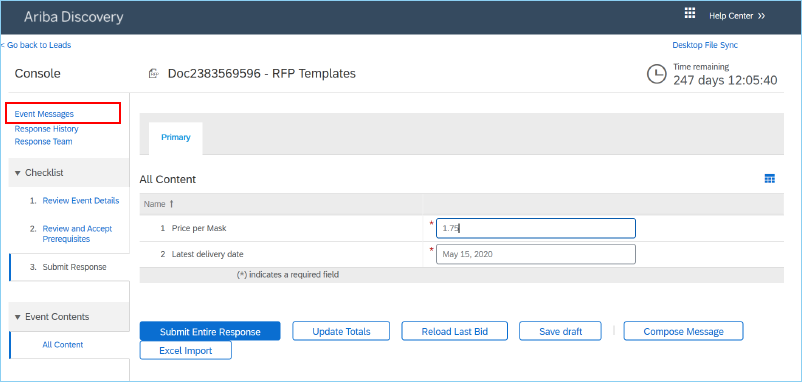
Once inside the event, you will be presented with the tender opportunity number at the top-left of the browser page. You will also note that the time remaining to respond to the tender opportunity is displayed at the top-right of the browser page.
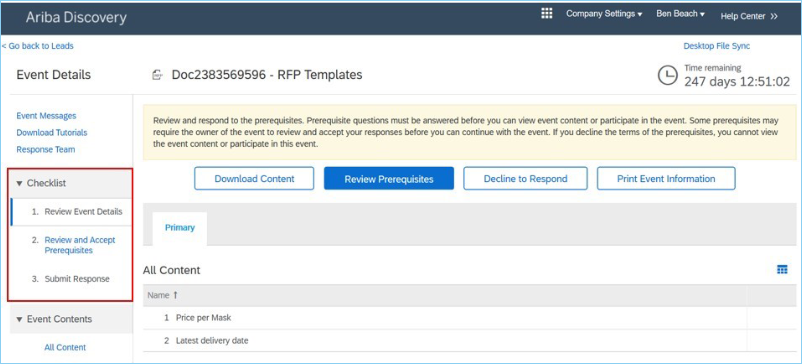
Step 10
On the left-hand side of the browser page, under Event Details, you will see a checklist. This must be completed to see the event in its entirety and to be able to respond to the tender opportunity. The checklist includes:
- Review Event Details
- Review and Accept Prerequisites
- Submit Response
Step 11
Click “Review Event Details.” This tab contains a general overview of information for the opportunity. When selected, the step will be highlighted with a blue bar to the left side, and the main display window to the right will display the relevant information.

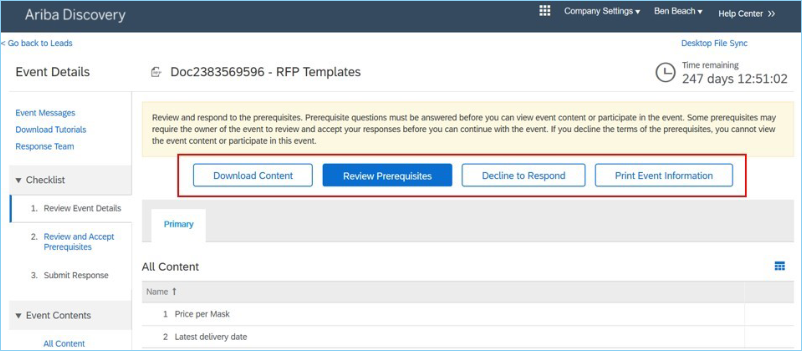
Step 12
On this page, you’ll find four buttons along the top of the browser page that need to be reviewed:
- “Download Content” – this provides an Excel summary of the event
- “Review Prerequisites” – this button takes you to the next step in the checklist, and is the required step that needs to be completed to gain access to the rest of the opportunity
- “Decline to Respond” – this allows you to decline to respond to the opportunity after reviewing more information about the event. Once you agree to the prerequisites, this button will no longer be visible
- “Print Event Information” – this allows you to download a summary of the opportunity in a Word document. You can print this document after you have submitted your response to keep a reference of your answers
If you wish to proceed with a response, click “Review Prerequisites”.
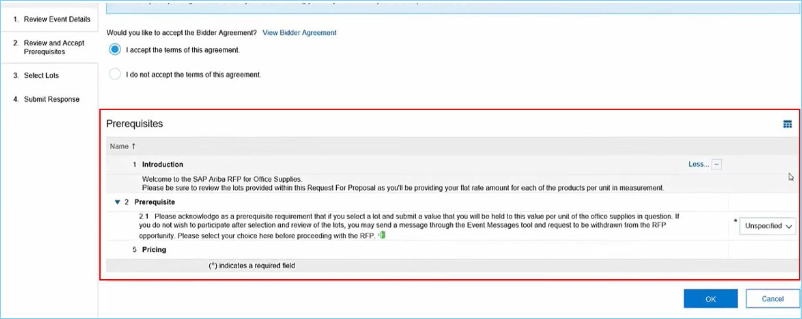
Step 13
The Review and Accept Prerequisites tab on the checklist is now highlighted with a blue bar to the left side. The main display window contains information for the review and acceptance of the prerequisites.

Step 14
After reviewing the agreement provided by the Government of Canada, you will be asked to accept the terms of the agreement. Click the radio button to confirm your acceptance and click “OK.” It is important to note that you will be asked to agree to these terms on each tender opportunity that you wish to respond to.
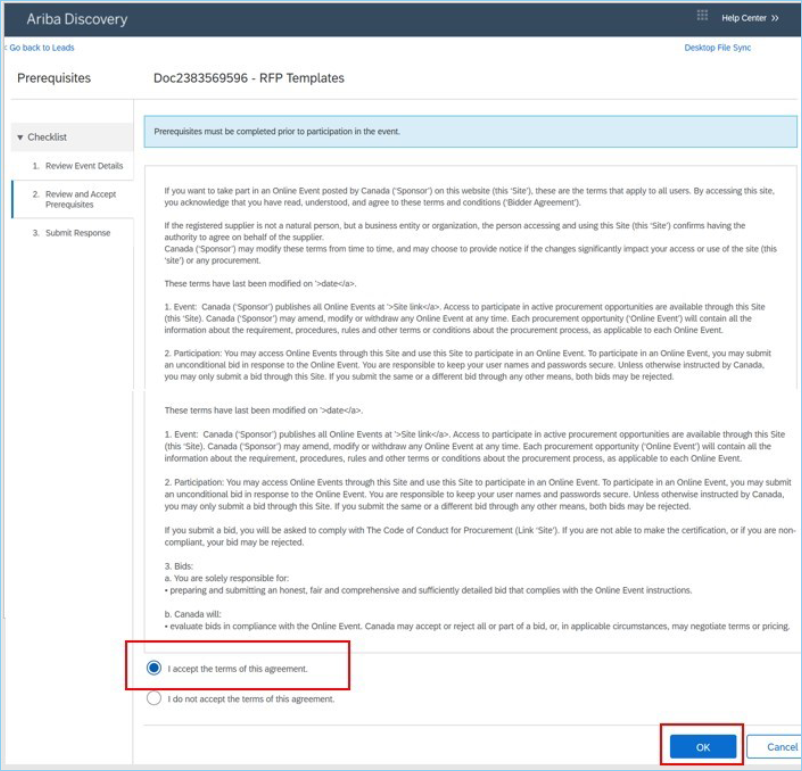
Note: There may be other prerequisites listed below the agreement acceptance that are specific to a particular opportunity. They may be simple yes/no responses, ask you to accept terms by checking a check box, or require you to include a file attachment such as a non-disclosure agreement.
Please review the entirety of the page to ensure all required fields (marked with an asterisk *) have been completed.
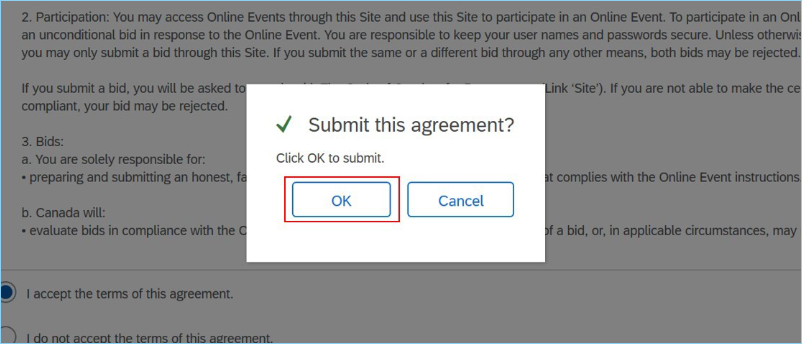
Step 15
You will be presented with a pop-up window confirming your acceptance to submit the agreement. Click “OK.”
Step 16
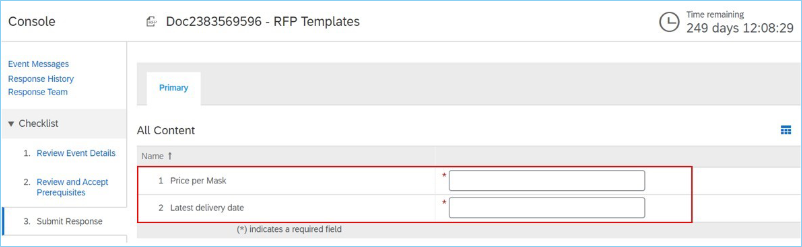
After you select “OK,” you will be directed to the next tab in the checklist, Submit Response. This tab will display the entire event’s content. Response fields will be available from the right side and will have an asterisk that will indicate which fields are mandatory.
Enter your responses by clicking on the relevant fields and providing an applicable answer.
Note: Answer types could be yes/no, multiple choice, monetary values, drop-down menus, free text fields, or require you to attach a document.
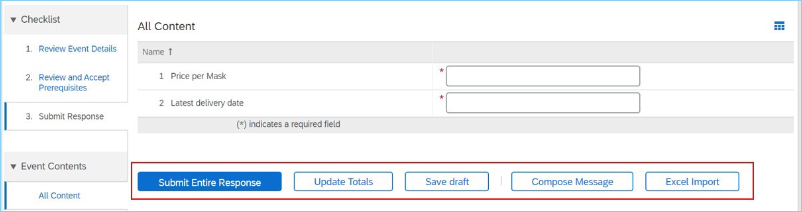
Step 17
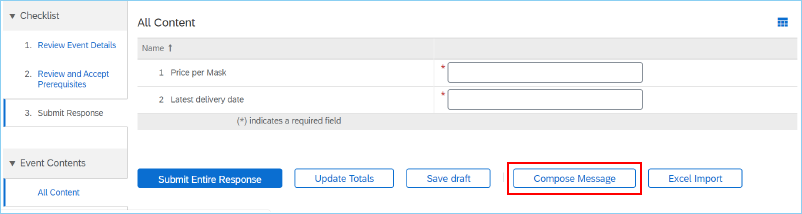
A series of function buttons are found at the bottom of the Submit Response page.
- “Submit Entire Response” – allows you to submit your response to the tender opportunity
- “Update Totals” – updates monetary values for the response based on values that were changed
- “Save Draft” – allows you to save your work as you progress through your responses. It is strongly advised to save frequently, as the site will not automatically save your entries
- “Compose Message” – allows you to privately message the buyer’s procurement team (see Step 25 for the compose message functionality)
- “Excel Import” – allows you to import excel files, as required. This function also allows you to export the tender opportunity to an Excel document, complete your responses, and then upload your responses in the Excel document
Note: Despite the Excel Import functionality being available in SAP Ariba, PSPC does not encourage its use and highly recommends that users complete the bid directly in Ariba.
Once you have completed your response, click “Submit Entire Response” to proceed. You will be able to make revisions to your response any time before the event deadline, even if it has been submitted.
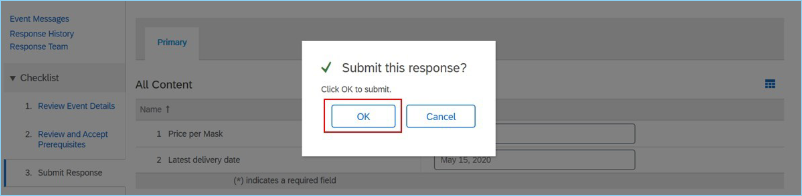
Step 18
Click “OK” to confirm that you want to submit your response.
Step 19
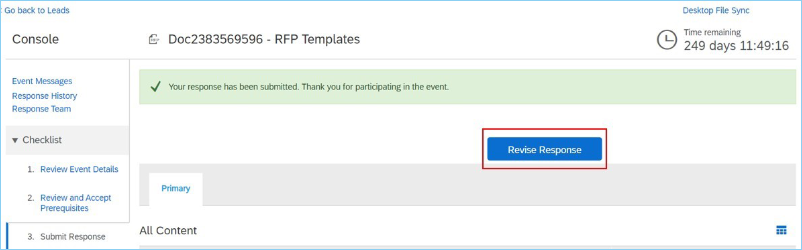
After your response is submitted, you will be directed to a page confirming your submission with a green banner message.
There is a “Revise Response” button below the confirmation message, allowing you to access your response and make revisions as necessary, before the response deadline.
If you want to revise your response after submitting, click “Revise Response.”
Step 20
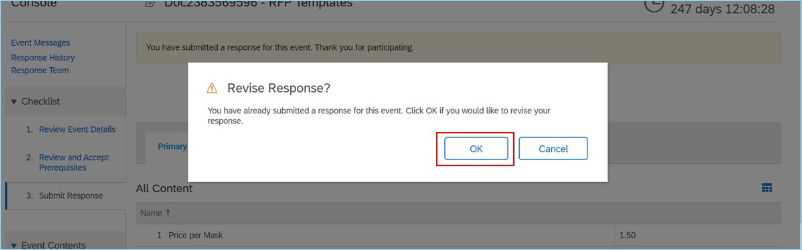
You will be presented with a pop-up window confirming that you have already submitted your response and asking if you’d like to revise your response. Click “OK.”
Step 21
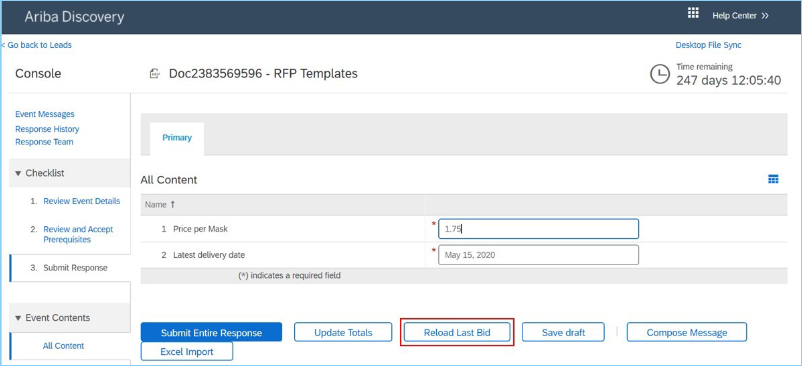
You can make changes to any of your submitted responses and re-submit as required.
There is also an option at the bottom of the page to “Reload Last Bid”, allowing you to undo any changes you may have made and revert to what you originally submitted.
Step 22
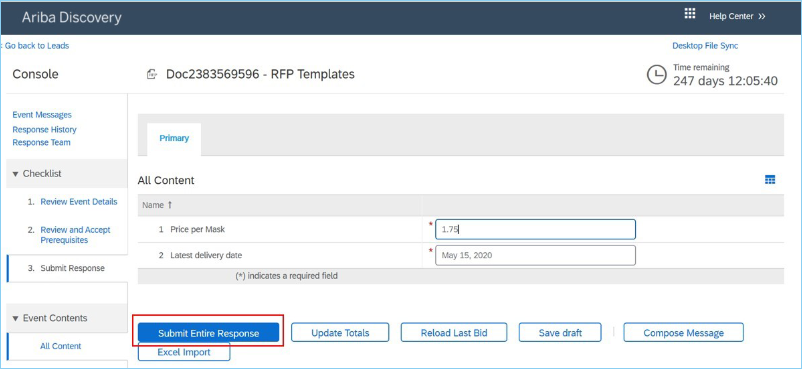
Once you have completed making changes to your response, click “Submit Entire Response.” You can continue to make changes to your response up until the response deadline.
Step 23
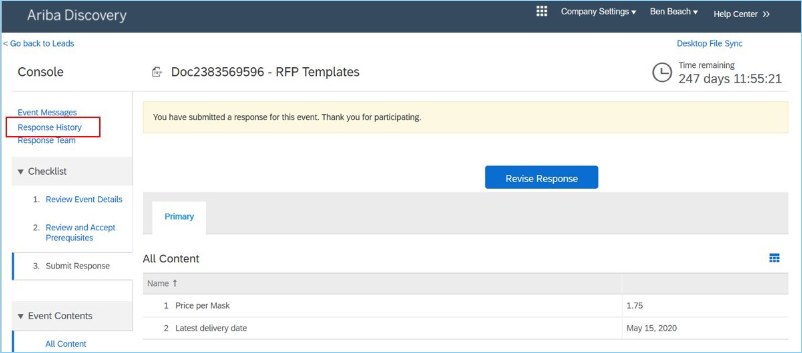
You can review your response history on the tender opportunity by selecting “Response History” from the menu on the left-hand side of the browser page. Click “Response History.”
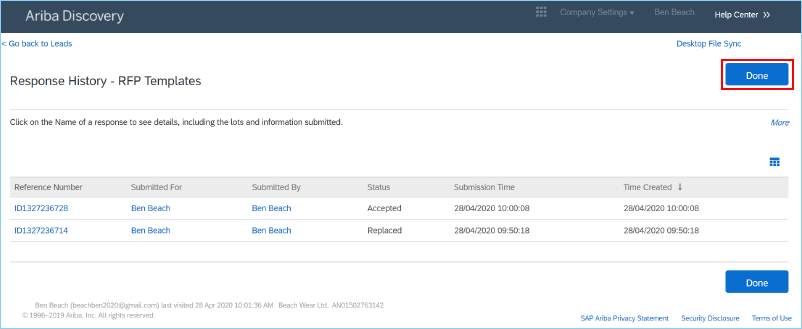
Step 24
Your response history is displayed. Click “Done” at the top-right of the browser page.
Step 25
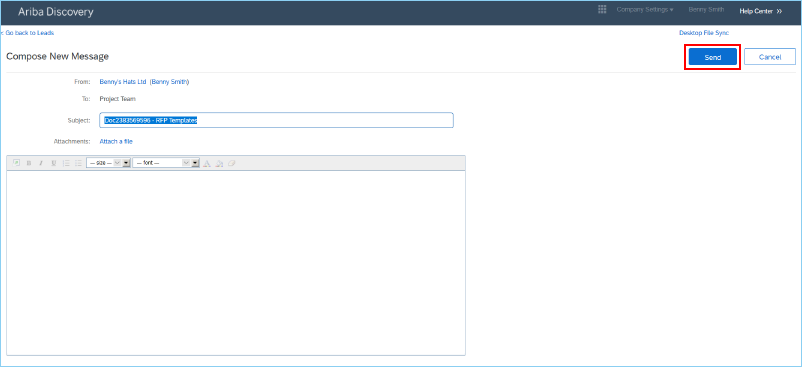
To ask questions about the event or to communicate with the buyer directly, you will be required to send the message directly through SAP Ariba. Select the “Compose Message” button on the response page.
Step 26
The Compose New Message page is displayed. You can edit the default subject line of the message and enter text in the body of the message, as well as attach files, if necessary. When you have finished composing your message, click “Submit” at the top-right corner of the browser page, and your message will be sent and you will be returned to the posting.
Step 27
Responses to your message will be sent through SAP Ariba, and you will receive it through email if you have your email notifications enabled. You can also access the response through the Event Messages Page at the top-left of the browser page.
The Event Messages board is also where the buyer may post public updates on the event.
Congratulations! You have successfully completed all the required steps to respond to an opportunity!
Here are some pointers and tips to be mindful about:
- Common errors pertain to response fields that are left as blank, or “unspecified” – you must select a response
- Do not submit another bid for the same opportunity – if there are changes required to your responses, please refer to Step 19 on how to make modifications on responses that have been previously submitted
- Depending on the browser you are using and your screen resolution, you may be required to scroll to the left or right of the browser page to view all of the content or find certain buttons that are required to navigate through the event
- Depending on the type of event and the responses required, you may be interested in bidding on multiple lots. In these cases, you must click the blue “Select Lots” button and fill out the required fields per lot. You will then be required to click “Confirm Selected Lots”
