
Registering on and logging in to SAP Business Network: A guide for businesses
Article-440
Are you ready to register your business on SAP Business Network to start viewing and bidding on Government of Canada tender opportunities? Use this step-by-step guide to help you get there! Before starting, you can use this checklist to prepare the information needed for registering.
Keep in mind that you can only have one SAP Business Network account per Canada Revenue Agency (CRA) business number.
If you have created more than one SAP Business Network account under the same CRA business number, contact the CanadaBuys Service Desk. Let them know which account you’ll be using to do business with the Government of Canada, and they’ll deactivate any other accounts. Deactivated accounts will be removed from the CanadaBuys system, but will remain on the SAP Business Network.
On this page:
- Create your account
- Log in to your account
- Complete these questions to bid
- Set up your company profile
Create your account
To log in to SAP Business Network you will first need to register for a username and password.
Step 1
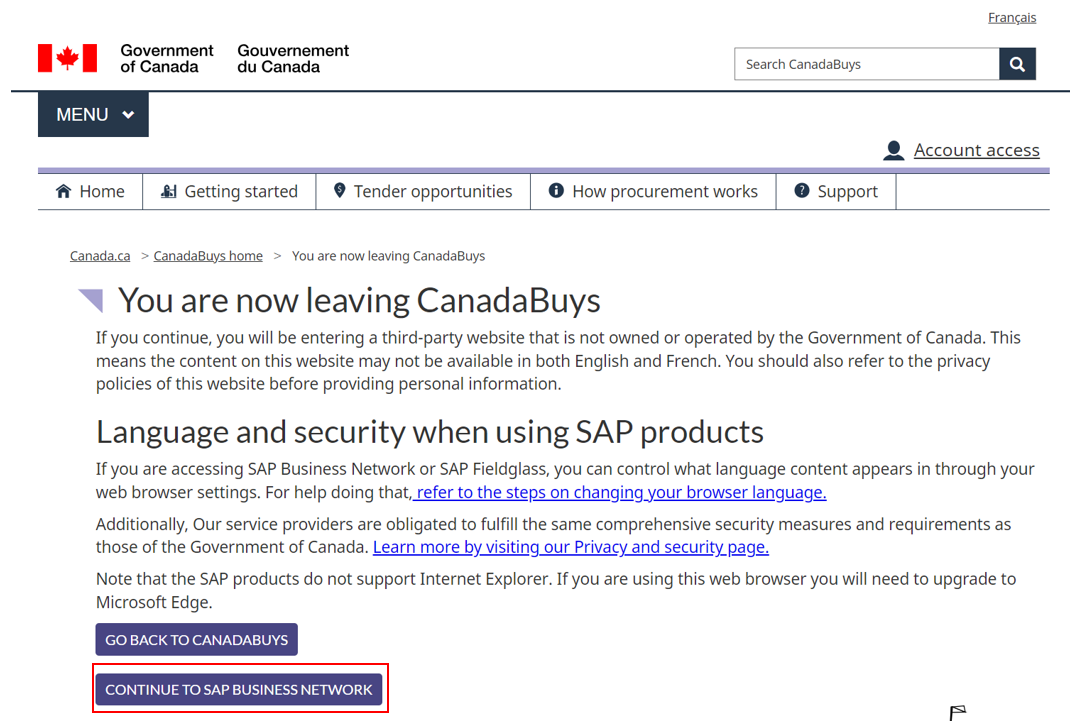
Go to our SAP Business Network registration page. On this page, click the “Continue to SAP Business Network” button.
Note: Make sure you use the link above to register because it will allow you to add Public Services and Procurement Canada (PSPC) to your customer list.
Step 2
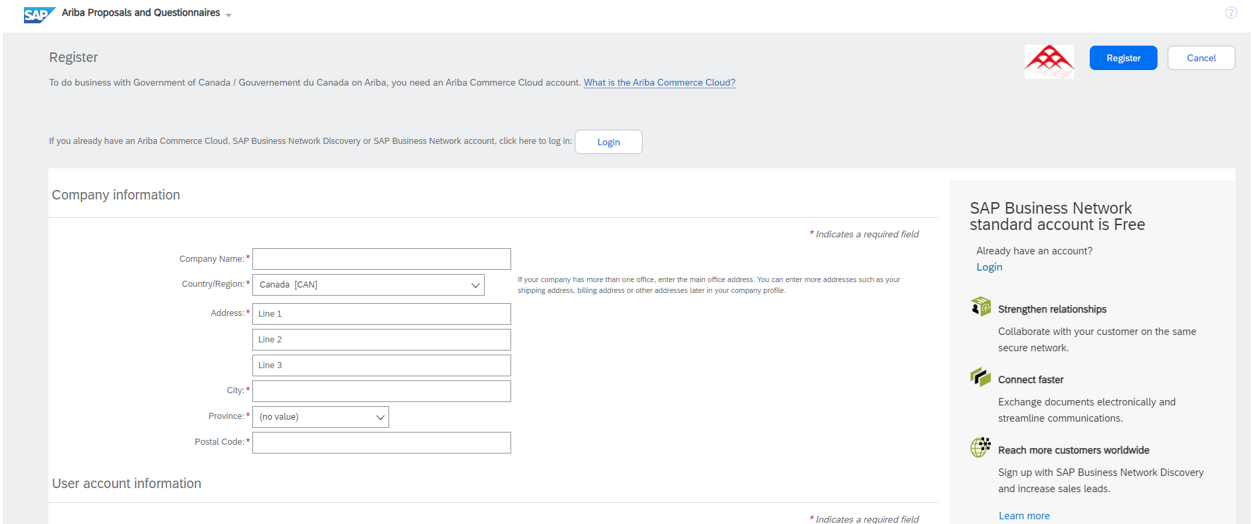
You will be brought to the Register page in SAP Business Network. In the Company information section, enter the following information in the fields provided:
- your business’s legal name
- the country where your business’s head office is located
- your head office’s address, including the street address, city, province or state, and postal code or zip code
Tip: If you are unsure of your organization’s legal name, use the Government of Canada’s GST/HST Registry Search to verify that you have entered the name registered with CRA.
Step 3
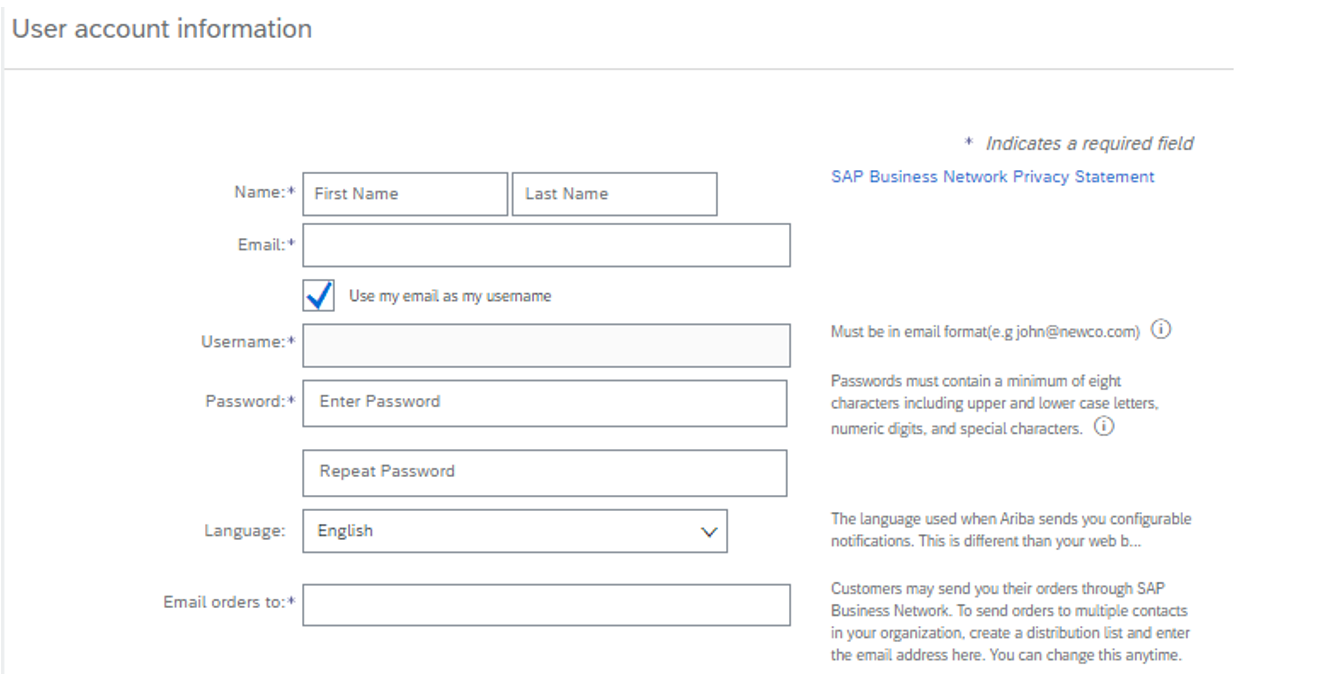
In the User account information section on the Register page, enter the following information in the fields provided:
- the first and last name of the main user
- an email address
- a username in email format (name@example.com)
- a password
- the language you want to receive notifications in
Tip: You can select the checkbox next to “Use my email as my username” above the Username field to use the same email address for both your contact and your username.
Finally, fill in the Email orders field in this section with the email address you want customers to send their orders to. This can be a distribution list.
Step 4
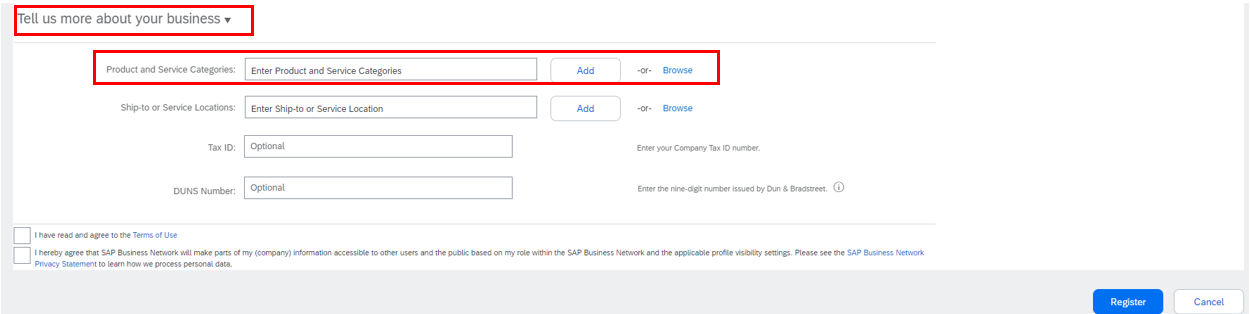
Click the arrow in the “Tell us more about your business” section and select at least one product and service category to complete your registration.
Step 5
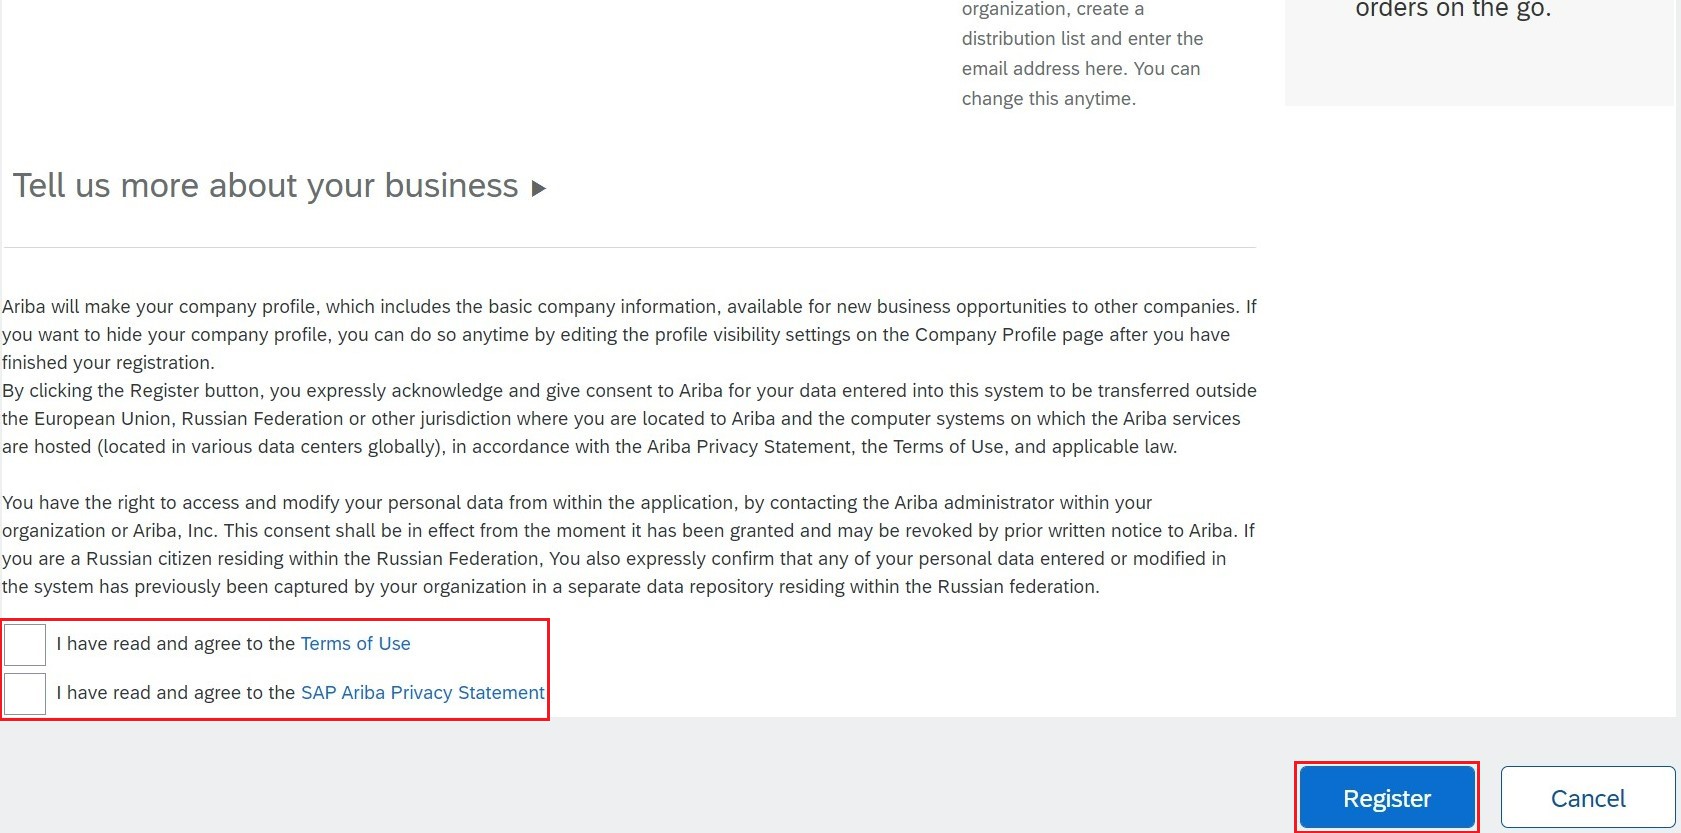
Before completing your registration, you must read and agree to the Terms of Use and the SAP Business Network Privacy Statement. Once you have read both of these, select the check boxes next to each statement and then click “Register.”
Step 6
You will receive an activation message at the email address you indicated in Step 2. Open this email and click the "Activate" link to confirm your email address. You have now created your SAP Business Network account!
Log in to your account
Once you have registered for an account, you can log in to SAP Business Network any time following the instructions below.
Note: You will be automatically logged out of SAP Business Network after 30 minutes of inactivity.
Step 1
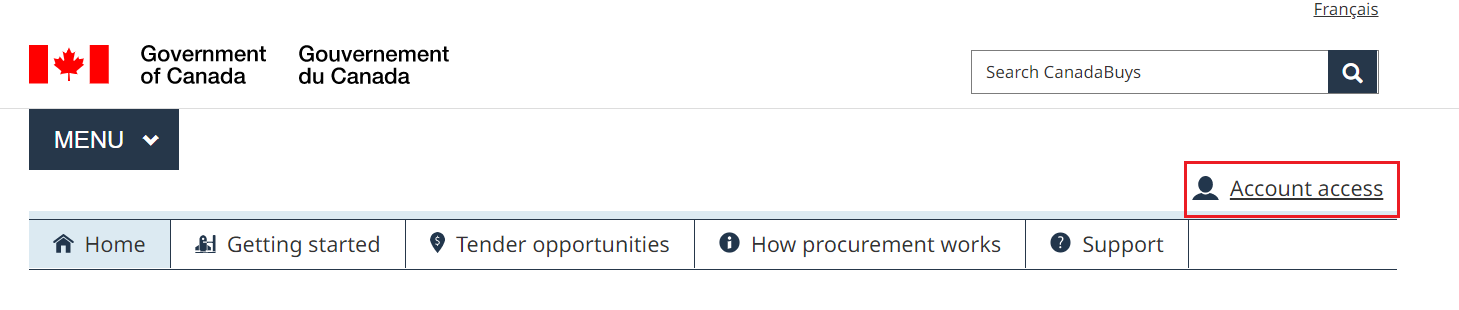
Click the “Account access” link in the top navigational menu of the CanadaBuys website to go to the Account access page.
Step 2
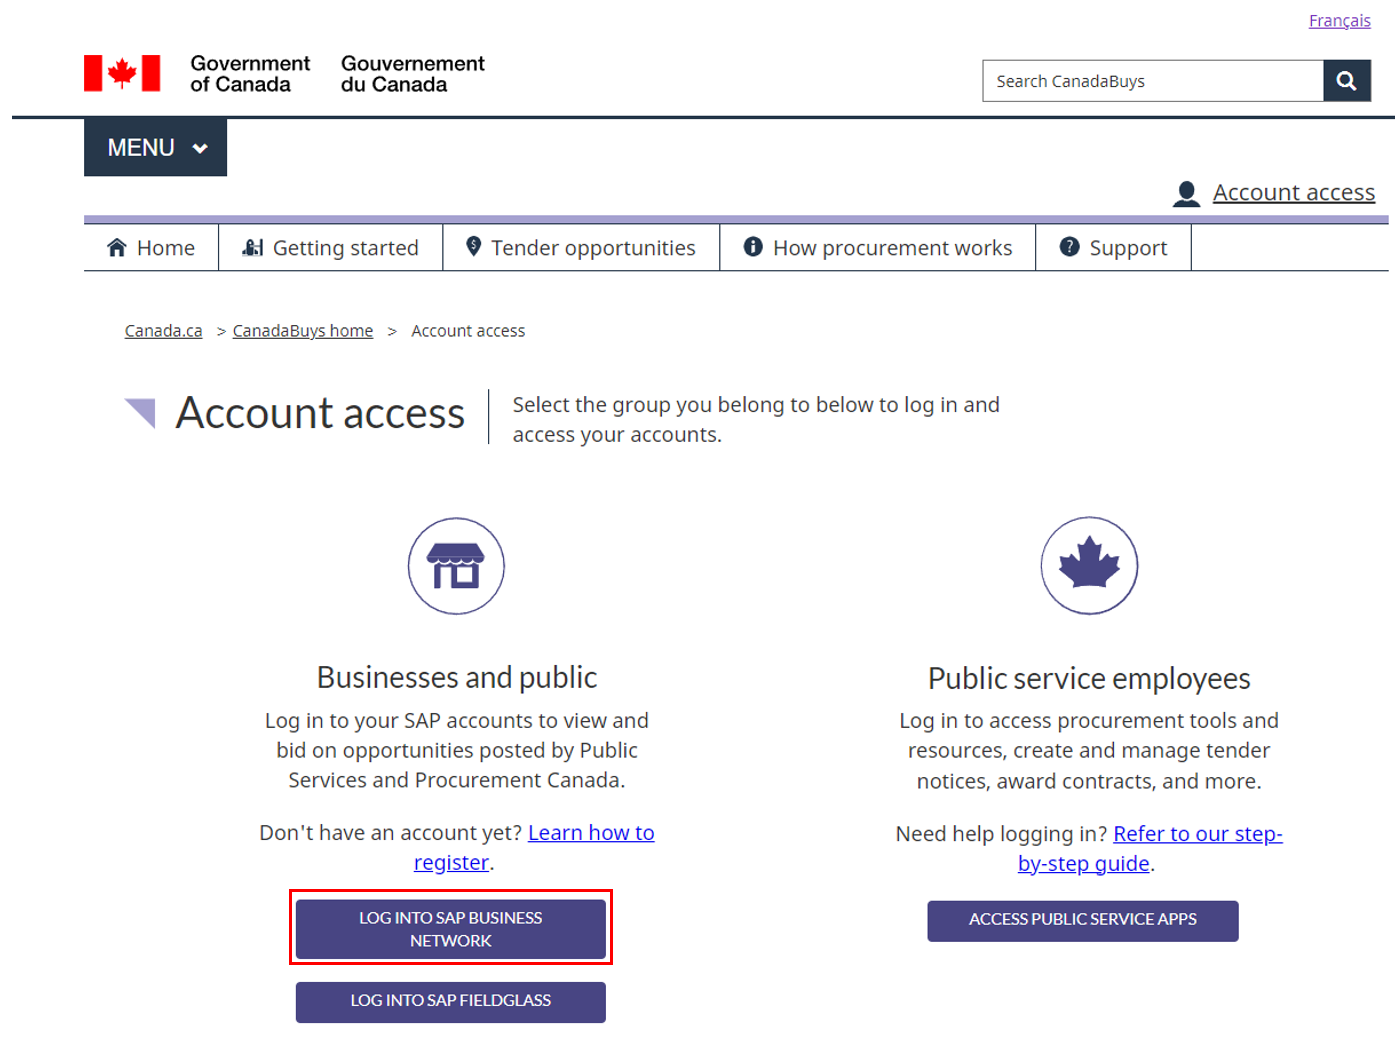
Under the Businesses and public section on the Account access page, click the “Log into SAP Business Network” button.
Step 3
On the next page, scroll down and click the “Continue to SAP Business Network” button.
Step 4
You will be brought to our SAP Business Network registration page. Click the “Login” button at the top of the page to be redirected to the supplier login page.

Step 5
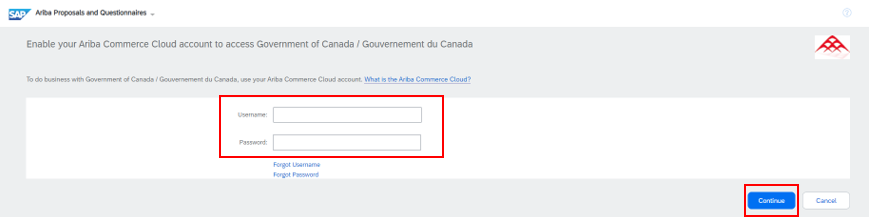
On the supplier login page, enter your login credentials in the fields provided. Once you are finished, click the "Continue" button.
Complete these questions to bid
Here, we’ll show you how to complete the Government of Canada’s required questionnaire. You must fill in questions 3 to 8 to submit a bids and question 9 is mandatory to complete your registration.
If you need help with any of the questions, contact the CanadaBuys Service Desk.
Note: You can edit and re-submit your responses to this questionnaire at any time.
Step 1
If you are not already, log in to SAP Business Network following the steps under the Log in to your account section of this guide.
Step 2
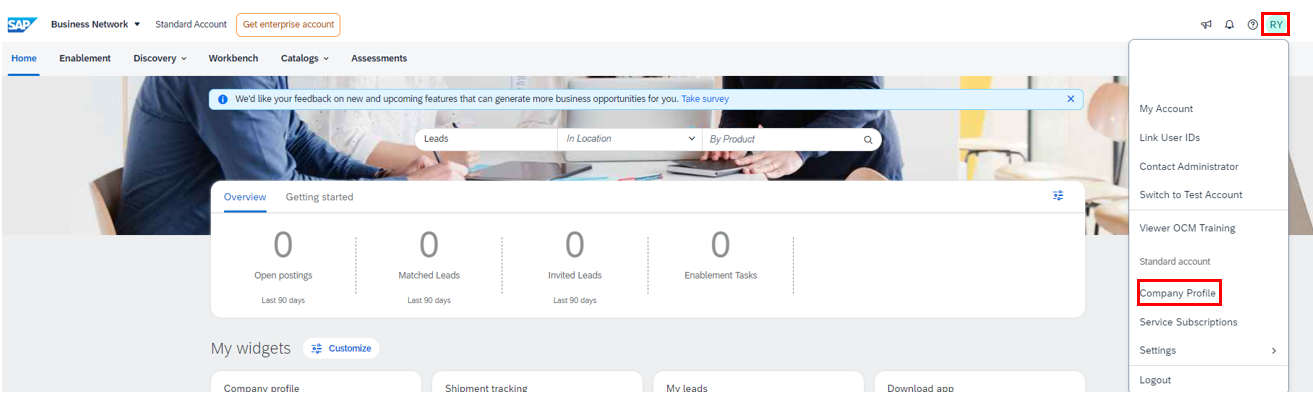
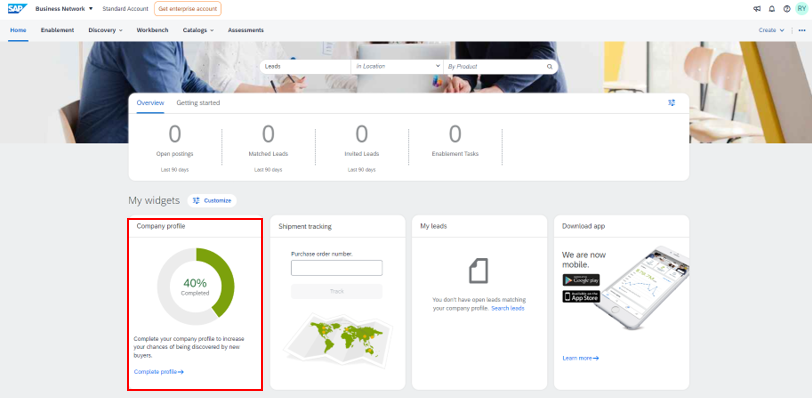
You will be brought to the SAP Business Network home page. From there, click on the circle with your initials in it at the top-right of the page and select "Company Profile" from the drop-down menu.
Note: You can find your account number ID (ANID#) in this drop-down menu.
Step 3
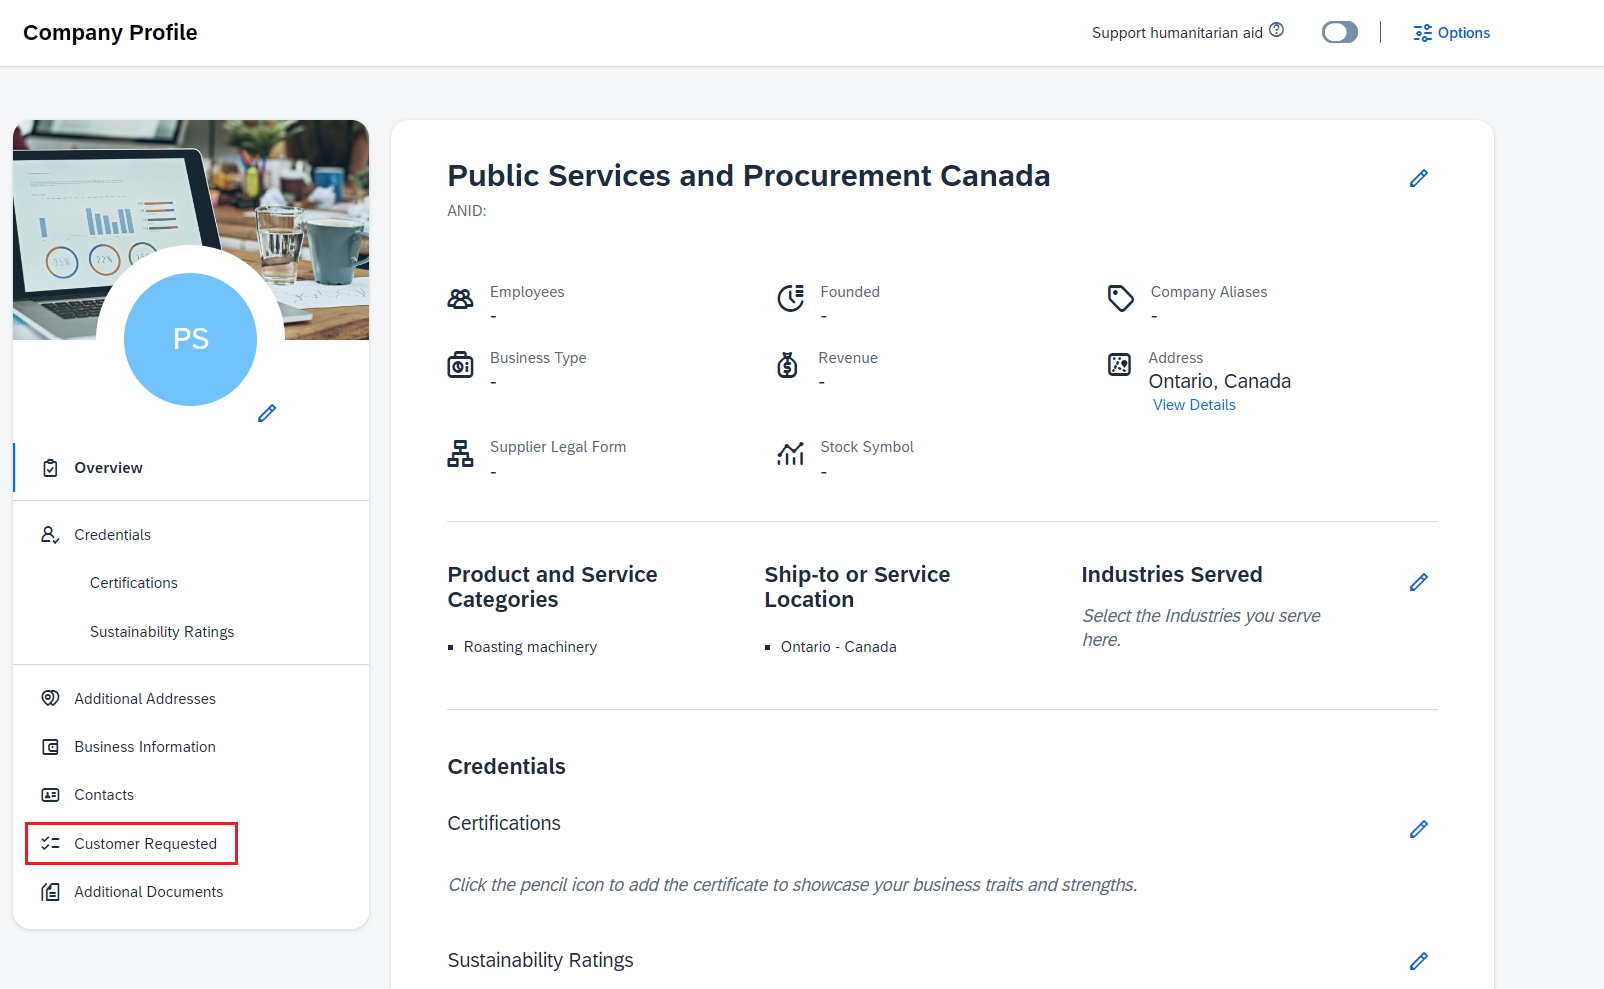
This will open the Company profile page. Click "Customer Requested" in the menu on the left side of the page.
Step 4
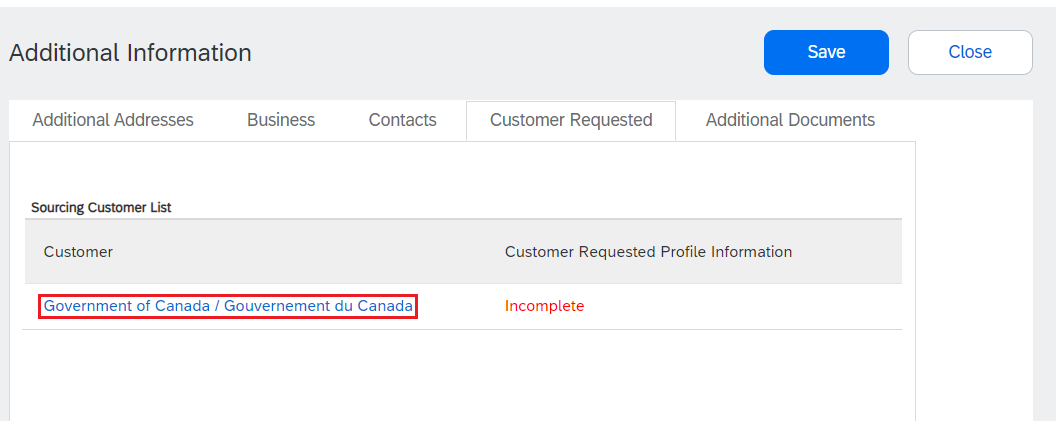
You will be brought to the Additional information page, with the Customer requested tab open. Select "Government of Canada / Gouvernement du Canada" from the Sourcing Customer list.
Step 5
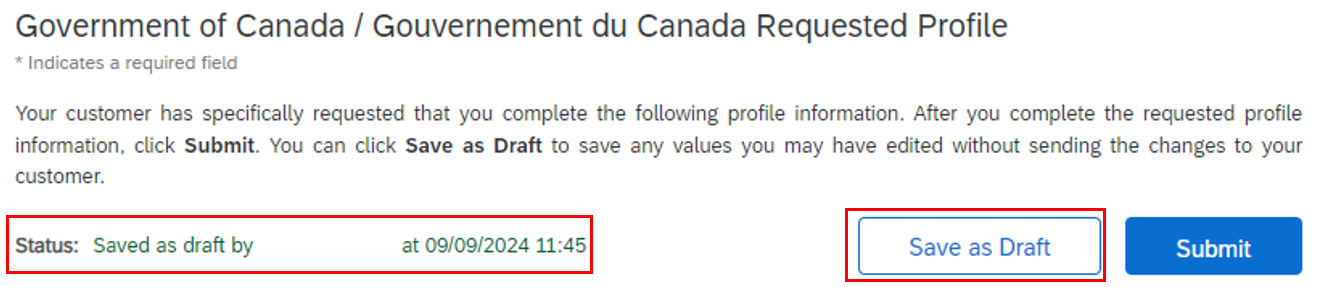
The questionnaire will open in a pop-up window and you can begin filling out the information.
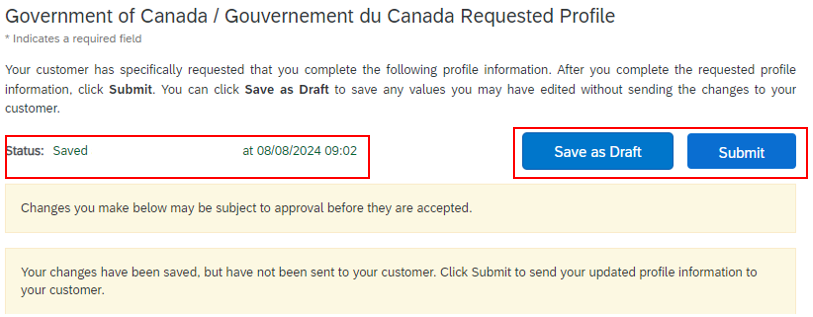
Tip: You can save your work at any point by clicking the "Save as Draft" button at the top of the page. A status message will appear indicating that you have saved the questionnaire as a draft.
Step 6
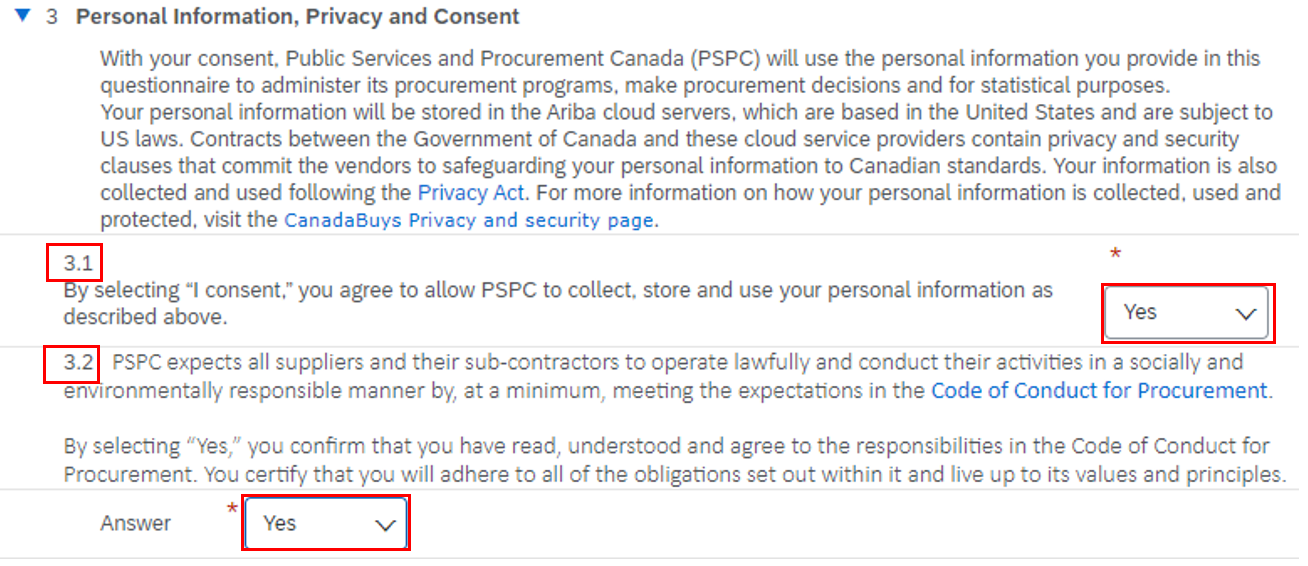
Start with answering question 3 – Your responsibility, which includes the following two parts:
- In 3.1, read the privacy notice and select “Yes” from the drop-down field to confirm you consent to allow PSPC to collect, store and use your personal information as described in the notice
- In 3.2, read the Code of Conduct for Procurement by clicking the link provided, and select “Yes” from the drop-down to confirm you have read, understood and agree to the responsibilities in the code
Step 7
Next, answer question 4 – General Company Information by selecting the industry from the drop-down menu that reflects your main business activity.

Step 8
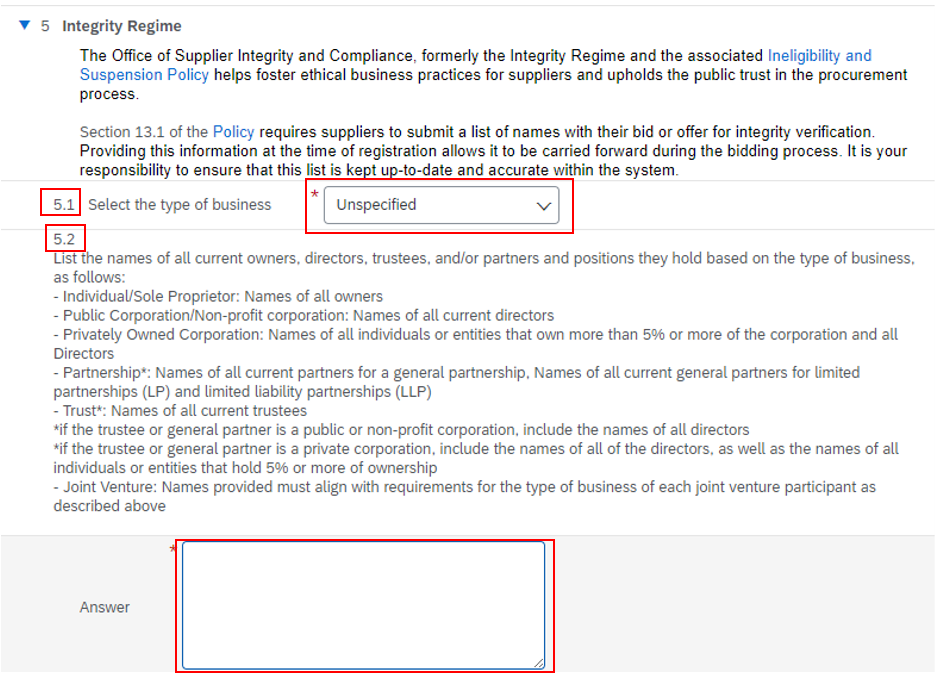
After that, go to question 5 – Integrity Regime. Under 5.1, select the type of business that best describes your main business activity from the drop-down menu.
Step 9
Next, in 5.2, enter the names of all current owners, directors, trustees, and partners in the text box provided. It is optional to include the position for each. List them based on the type of business as follows:
- Individual / sole proprietor: Add the names of all owners
- Public corporation / partnership / trust: Add the names of all current directors, partners and trustees
- Privately owned corporation: Add the names of all directors and all individuals or entities that own 5% or more of the corporation
- Partnership1,2: Add the names of all current partners for a general partnership, the names of all current general partners for limited partnerships (LP) and limited liability partnerships (LLP)
- Trust1,2: Add the names of all current trustees
- Joint venture: Names provided must align with requirements for the type of business of each joint venture participant as described above
1 If the trustee or general partner is a public or non-profit corporation, include the names of all directors.
2 If the trustee or general partner is a private corporation, include the names of all directors, as well as the names of all individuals or entities that hold 5% or more of ownership.
Step 10
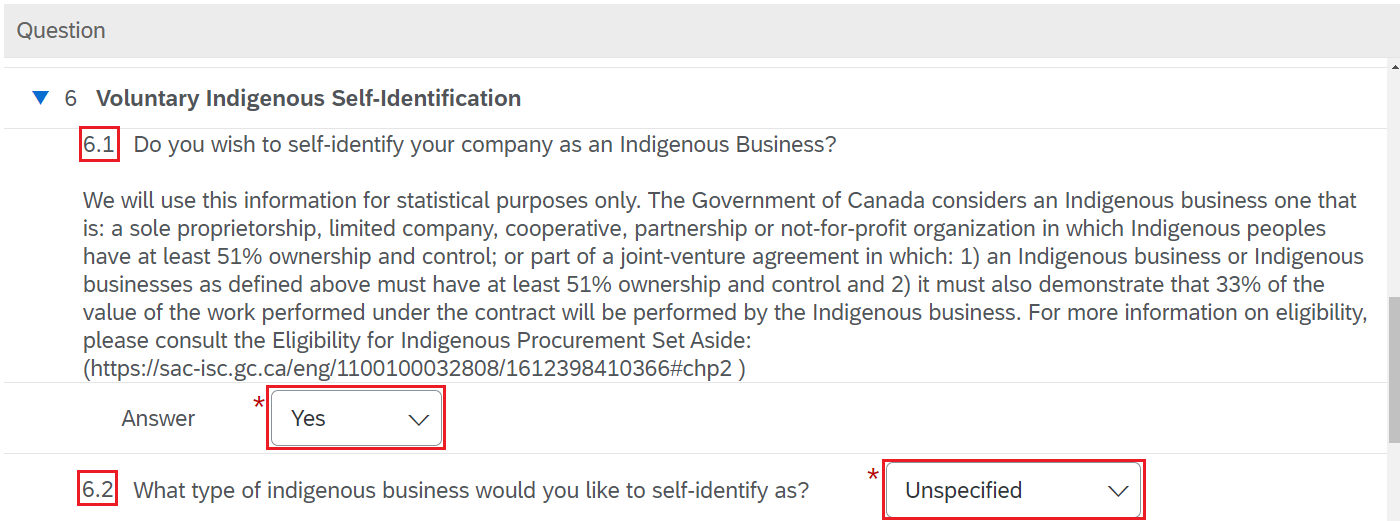
Next, fill out question 6 – Voluntary Indigenous Self-Identification. The question asks if you wish to identify your business as Indigenous. A definition is provided for reference. The responses are used for statistical purposes only. It is also collected so that PSPC can make informed decisions about program initiatives, such as the Procurement Strategy for Indigenous Business.
Select “yes” or “no” from the drop-down menu under 6.1 to indicate if you wish to self-identify. If you select “no,” skip to Step 11 below. If you select “yes,” you will be asked to answer the following additional parts:
- In 6.2, select what type of Indigenous business you would like to self-identify as from the drop-down menu
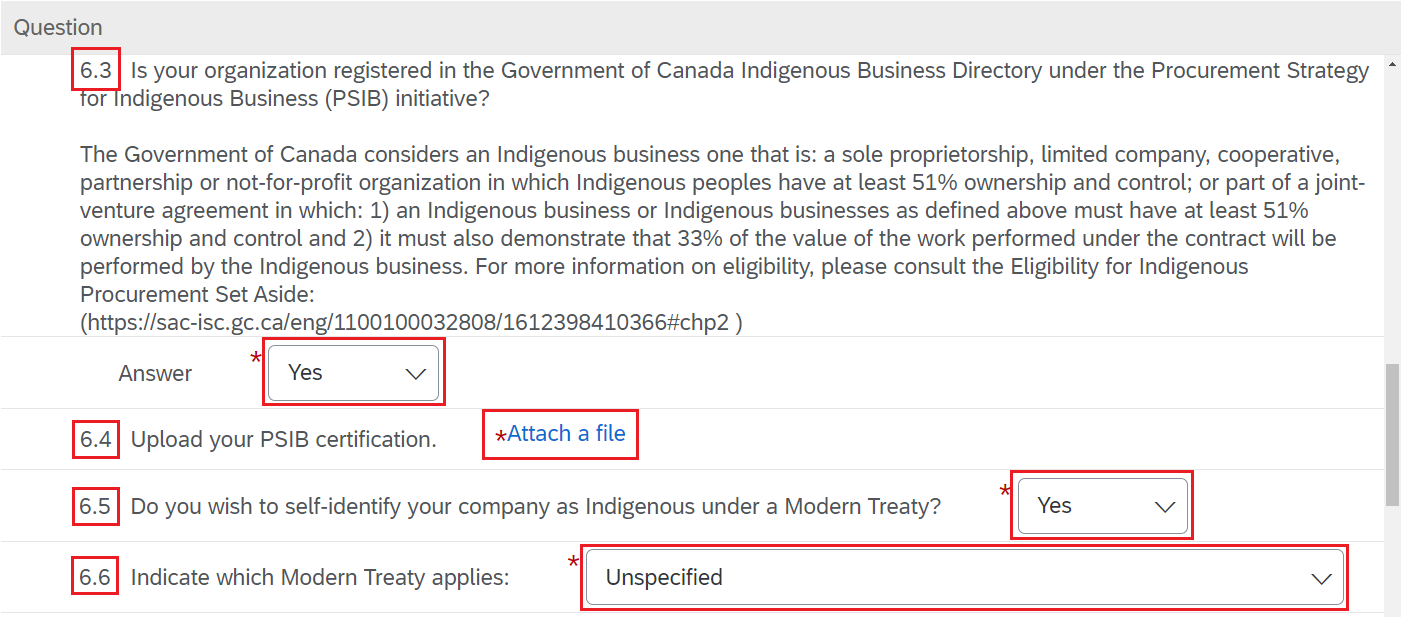
- In 6.3, select “yes” or “no” to indicate if your organization is registered in the Government of Canada Indigenous Business Directory under the Procurement Strategy for Indigenous Business (PSIB) initiative
- If you select yes to 6.3, you will see 6.4 appear where it will ask you to upload your Indigenous Business Directory (IBD) registration
- In 6.5, indicate if you wish to identify as Indigenous under a Modern treaty
- If you select yes to 6.5, you will see 6.6 appear where you can select which Modern Treaty applies from a drop-down list; you can also choose “other” if the Treaty is not listed
Note: Any of the following examples are acceptable forms of IBD registration:
- proof of registration in the IBD
- an identity document that confirms you are registered as a Status Indian under the Indian Act
- confirmation of Indigenous ancestry (Status Card)
Step 11
Go to question 7 – Voluntary Under-Represented Groups Self-Identification. This question asks if you wish to voluntarily self-identify as a Canadian business owner or leader who is a member of one or more equity-deserving groups. If you belong to a diverse population group and would like to participate in social procurement initiatives, providing your personal information, such as gender identity and racial or cultural origin, could help you qualify.
Select “yes” or “no” from the drop-down menu under 7.1 to indicate if you want to self-identify. If you select “no,” skip to Step 12 below. If you select “yes,” you will be asked to answer the following additional parts:
- For 7.2, indicate if your business is wholly-owned or majority owned by an individual that identifies as belonging to one or more of the groups listed in the drop-down menu
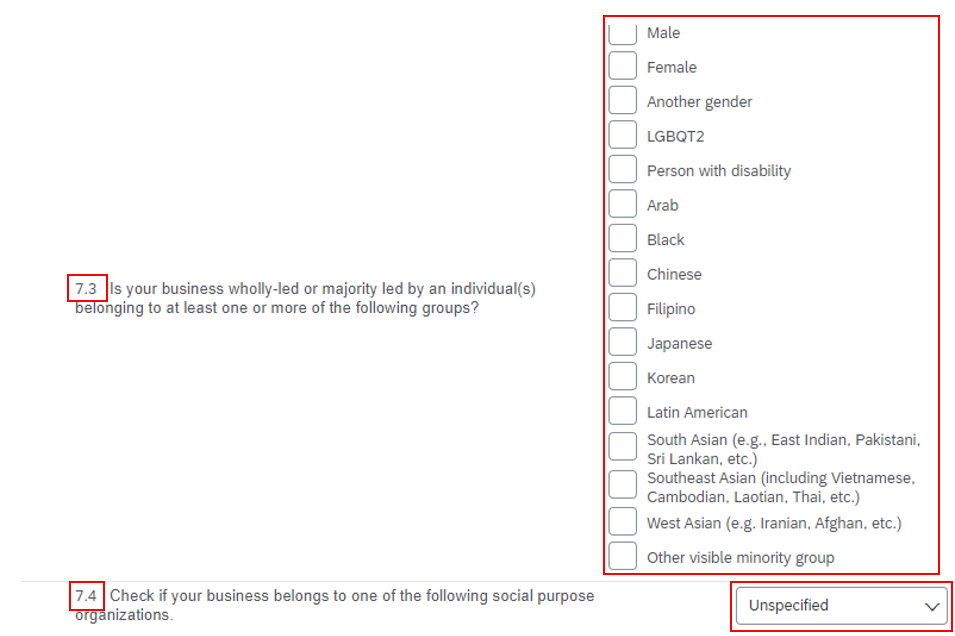
- For 7.3, indicate if your business is wholly-led or majority led by an individual that identifies as belonging to one or more of the groups listed in the drop-down menu
- For 7.4, select the social purpose organizations your business belongs to from the list that appears in the drop-down menu
If none of the available options apply or you do not wish to respond to any part of question 7, you can leave it blank. Responding to these questions is optional. PSPC collects and uses the information for administrative and statistical purposes only, as well as to make informed decisions on program initiatives.

Step 12
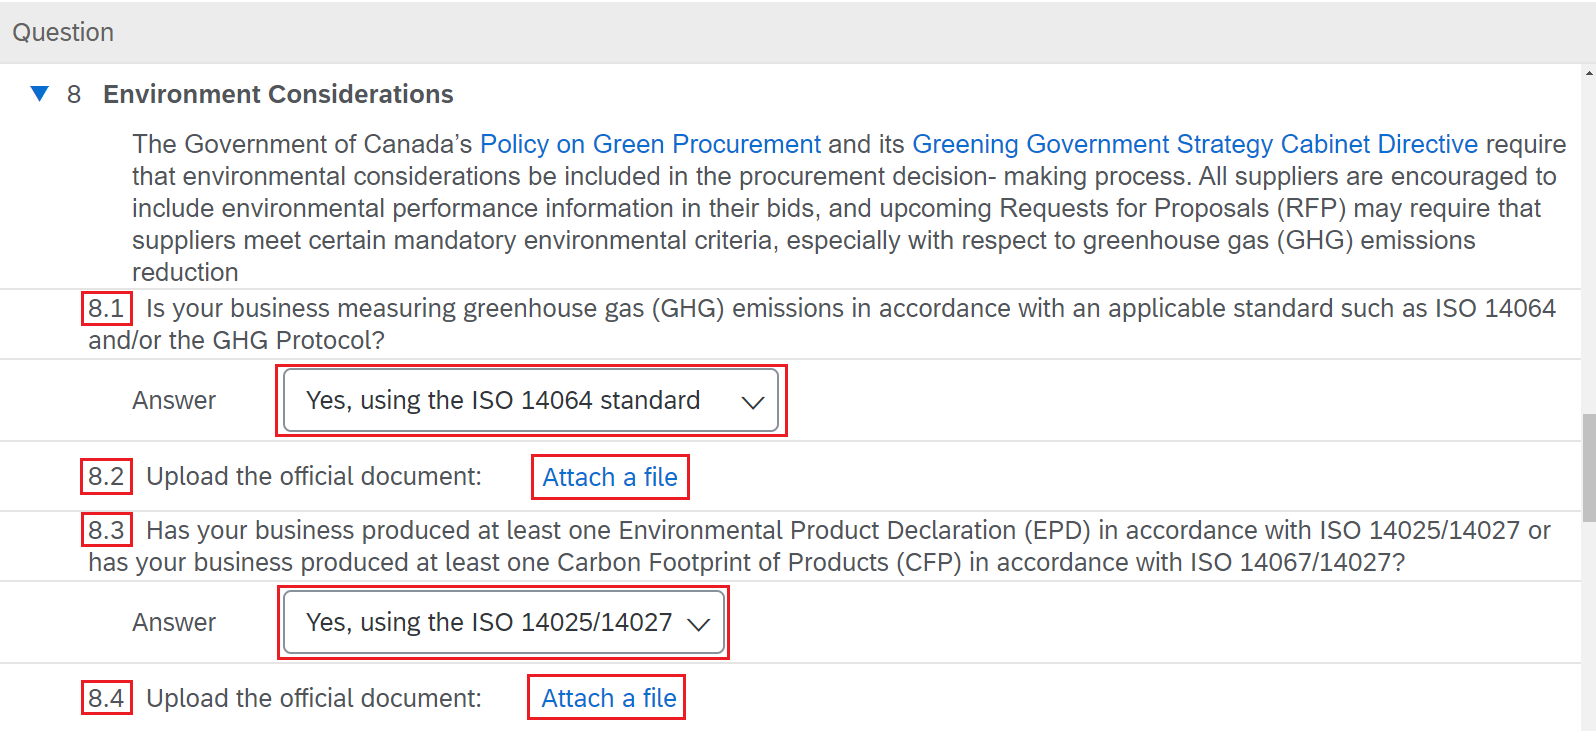
Respond to the following two parts of question 8 – Environment Considerations:
- In 8.1, select an answer from the drop-down menu to indicate whether your business is measuring greenhouse gas emissions using a standard such as ISO 14064
- If you select a standard in 8.1, you will see 8.2 appear where you can upload an official document for the standard you are using
- In question 8.3, select an answer from the drop-down menu to indicate whether your business has been rated by a sustainable supplier’s rating system
- If you select a sustainable supplier’s rating system in 8.3, you will see 8.4 appear where you can upload an official document about the sustainable supplier’s rating system you are using
Step 13
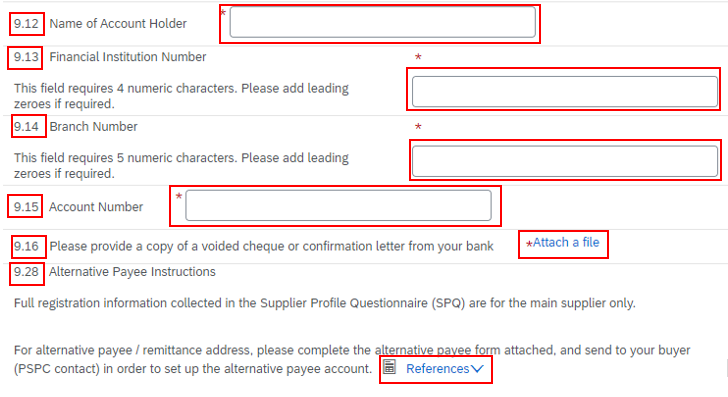
Finally, you will need to respond to question 9 – Full Registration. First, answer “yes” to question 9.1 to provide the CRA business number of your organization. This step is required to validate your CRA business number and approve your registration.
Next, enter your payment information by following the steps in the "Entering your payment information in SAP Ariba" guide.
Note: The user creating the account must be the main administrator and have access to payment information to complete sections under question 9.

Step 14
Once you have responded to questions 3 to 9, click the "Submit" button at the top of the page. You will see a message in a green banner confirming you successfully submitted the questionnaire.
Note: You can also click the “Save as draft” button if you are missing information and aren’t ready to submit the questionnaire.
Congratulations! You are now able to bid on PSPC tender opportunities.
Set up your company profile
After registering and completing the required Government of Canada questionnaire, you can set up the basics of your company profile. Follow the steps below to do that.
Note: The Public Profile Completeness meter displayed does not need to reach 100% completion to create a business account for the Government of Canada. Only the following mandatory fields are required to complete your registration.
Step 1
If you are not already, log in to SAP Business Network following the steps under the Log in to your account section of this guide.
Step 2
Once you are logged in, you will be brought to the SAP Business Network home page. From there, click the circle with your initials at the top-right of the page and select "Company Profile" from the drop-down menu.

Step 3
This will open the Company profile page. From here you can add or edit the following mandatory fields:
- basic information about your company, including address and, number of employees (steps 4 to 6)
- product and service information (steps 7 to 12)
- contact information, including main email address and phone number (steps 13 to 14)
Note: Providing additional information is not required to do business with the Government of Canada.
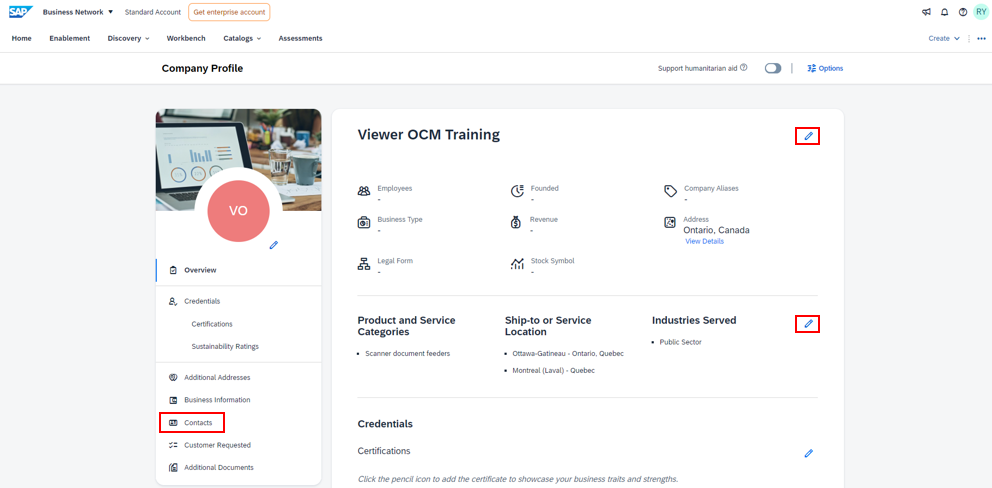
Step 4
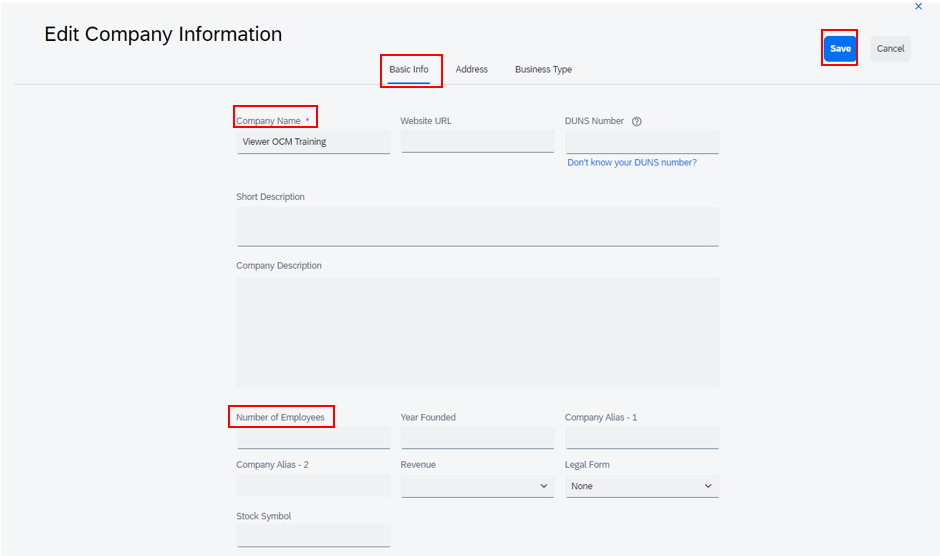
Click the pencil icon next to your company name. The Edit Company Information page is displayed. Under the Basic Info tab you must enter the following:
- your business’s legal name (the company name field will automatically be filled out with the name you provided during registration)
- number of employees that your business currently employs
When you are finished, click the “Save” button at the top-right of the page.
Tip: If you are unsure of your business’s legal name, you can use the Government of Canada’s GST/HST Registry Search to verify that you entered the name registered with CRA.
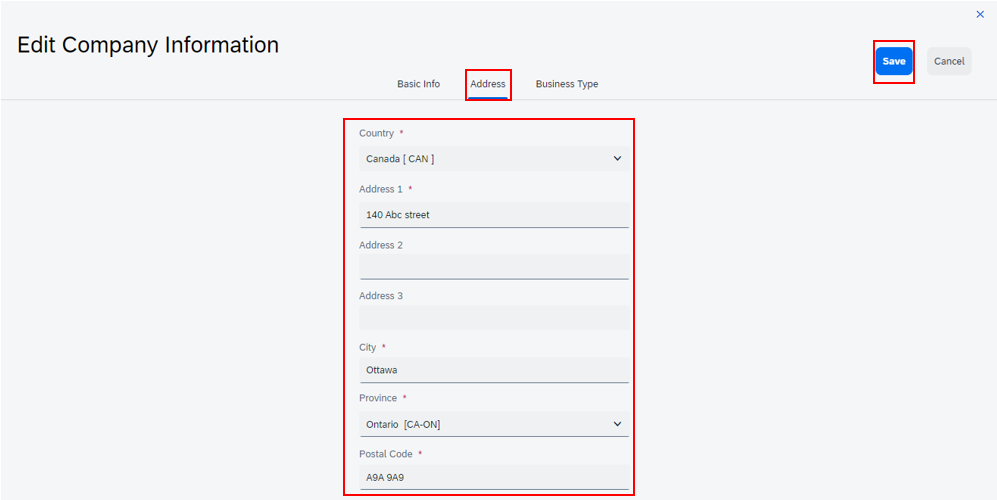
Step 5
Click the “Address” tab to edit your company address. The main address you provided while registering will auto-populate in the address section. Make any changes if needed. Fill in the following required fields:
- Country
- Address
- City
- Province
- Postal Code
When you are finished editing your company information, click the “Save” button in the top-right corner of the page.
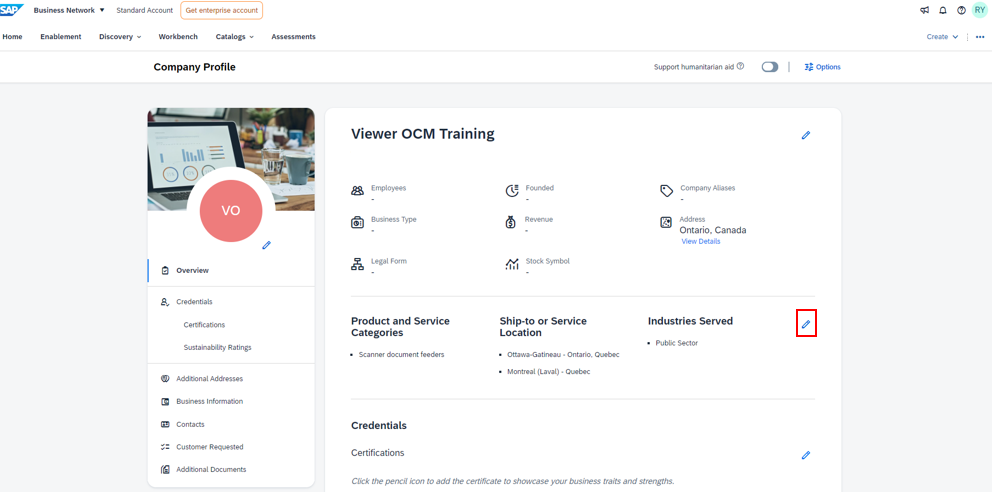
Step 6
Click the pencil icon next to the Industries Served title in the middle of the page. The Edit Product and Service Information page is displayed.
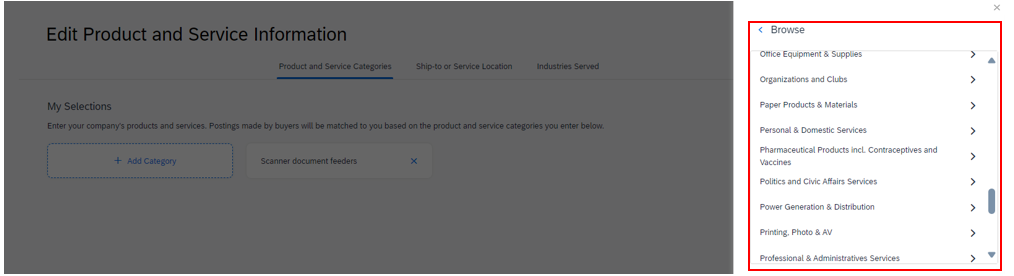
Step 7
Click the “Add Category” button. The Add new category pane is displayed on the left side of the screen.


Step 8
Enter a category into the Search field or click “Browse all categories” to choose from a list of available categories.
Tip: You can add as many categories for your business as you would like before proceeding to the next step. If you don’t see a category that relates specifically to your business, select the closest match.
For more information on product and service category, refer to the guide Viewing Government of Canada tender opportunities on Ariba Discovery.
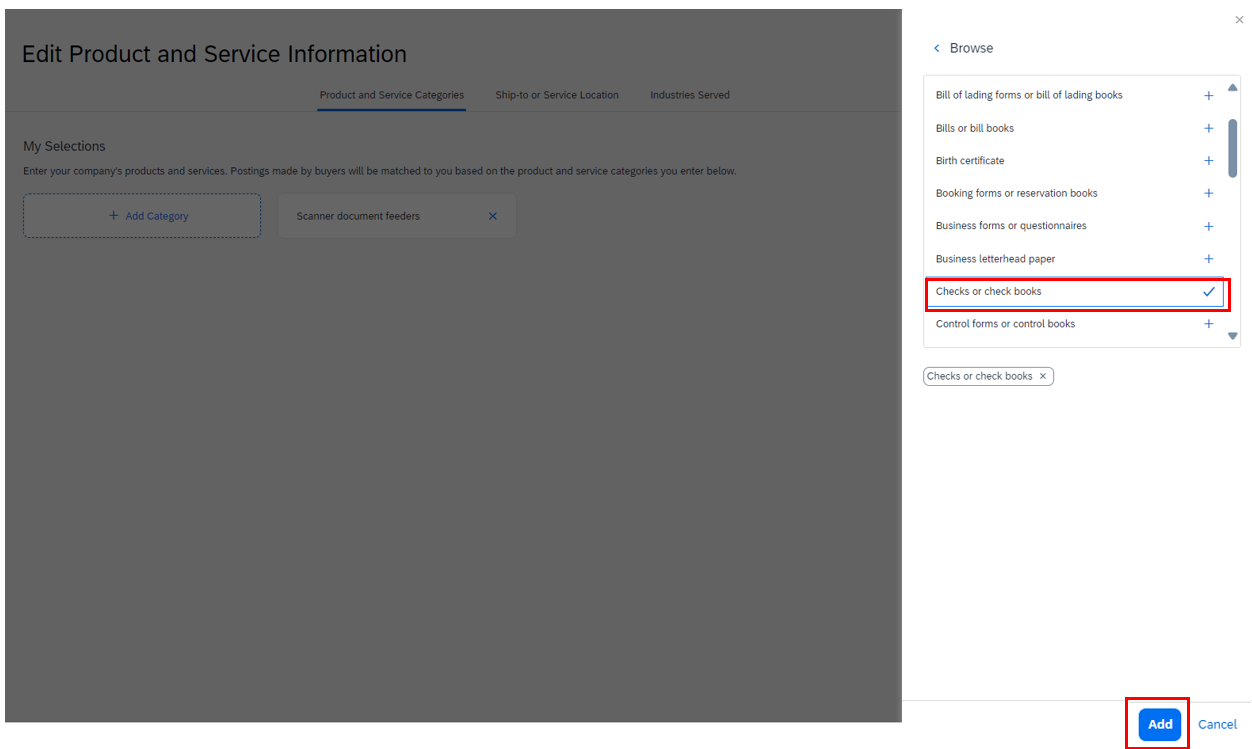
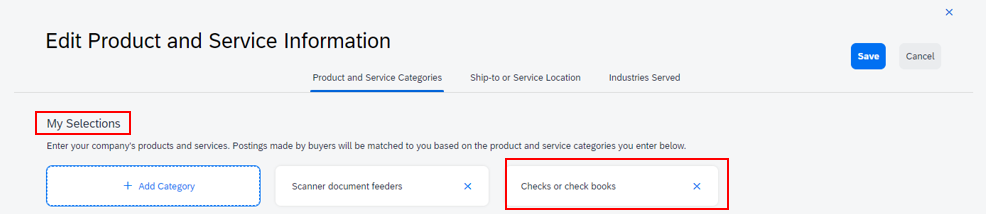
Step 9
When you are finished adding categories, click the “Add” button in the bottom right of the screen. The categories you have added are displayed under the “My Selections” section of the page.
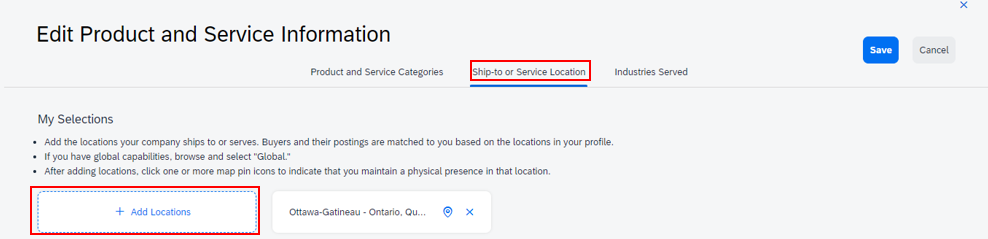
Step 10
Click the “Ship-to or Service Location” tab. Add the locations your company ships to or serves by clicking the “Add Location” button.
Step 11
The “Add new locations” pane is displayed on the right side of the screen. Enter a location into the Search field or click “Browse all locations” to select one from a list.
Tip: You can add multiple locations before continuing to the next step.

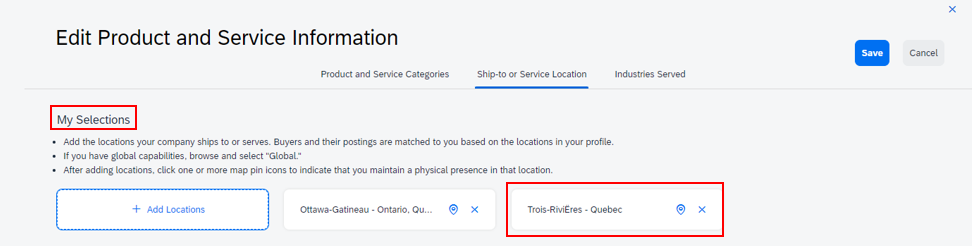
Step 12
When you are finished, click the “Add” button in the bottom right of the screen. The locations your company ships to or serves are displayed under the “My Selections” section.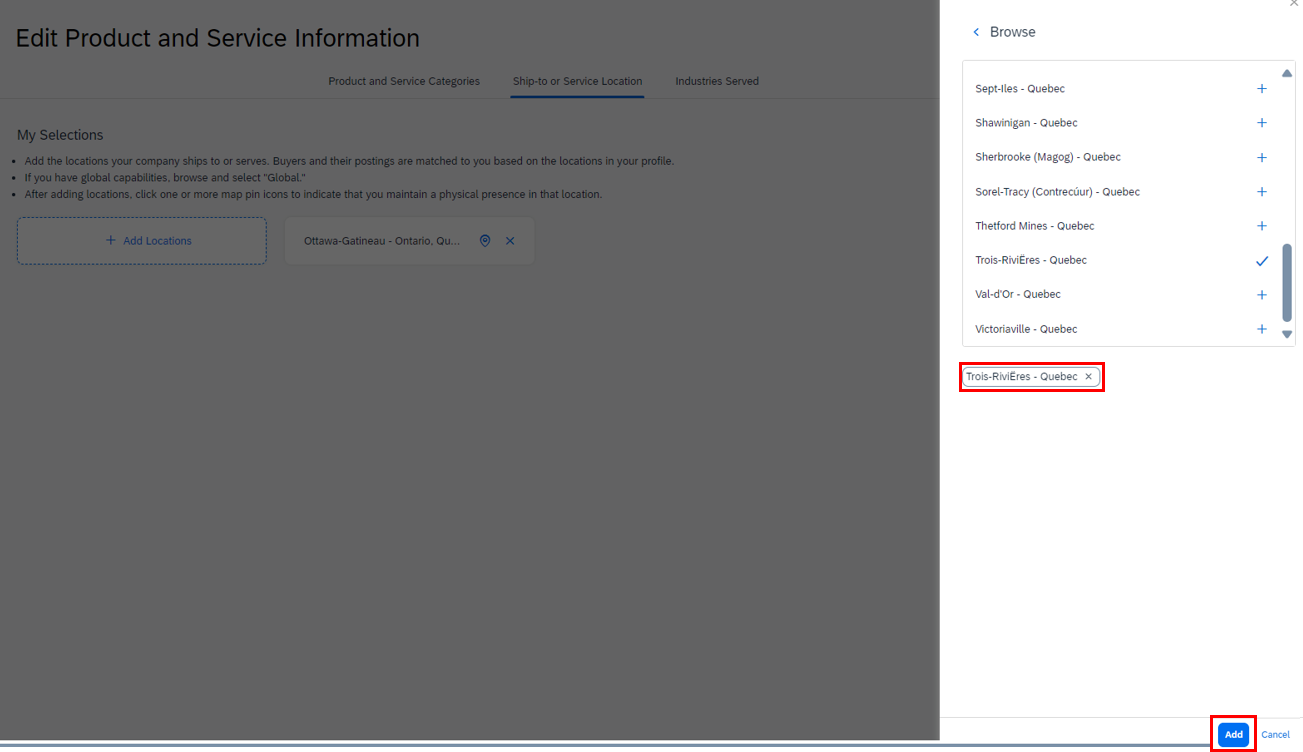
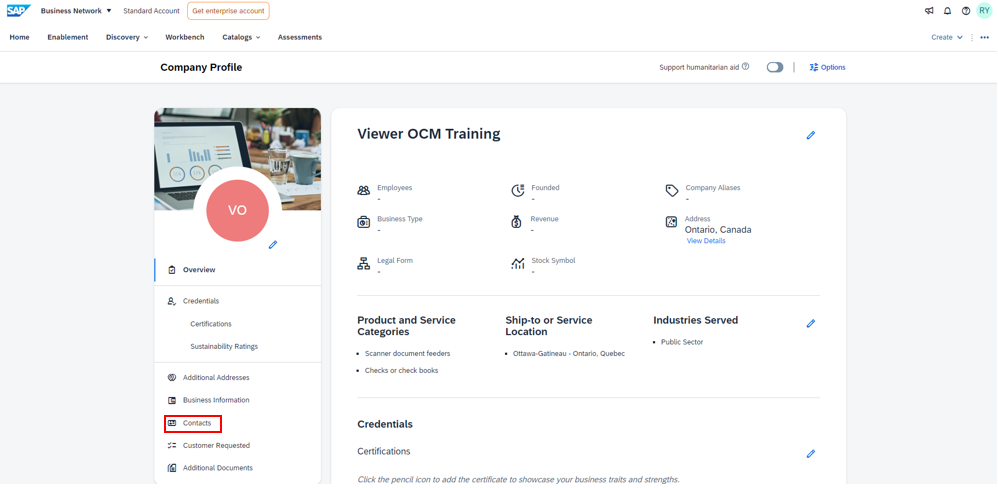
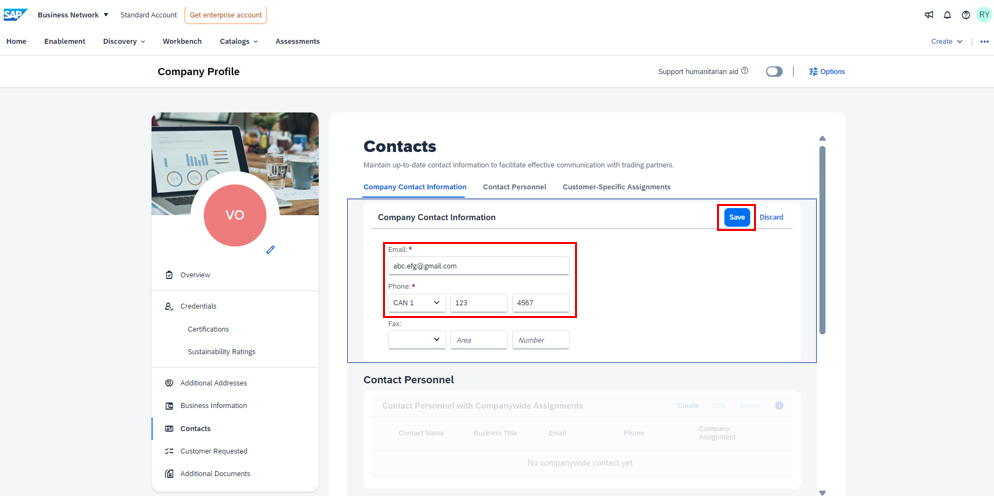
Step 13
Follow the steps below to edit your business’s contact information.
Click the “Contacts” tab to enter contact information for your business. The Contacts tab is displayed. Under the Company Contact Information section enter the main email and phone number for the account administrator.
For help adding users and assigning roles, refer to our guide on Adding users and assigning roles in your business’s SAP Ariba account.
Step 14
When you are finished, click the “Save” button in the top right corner of the page.
Note: By default your company profile information is available to other users on SAP Business Network. Manage your profile visibility settings to choose which information you want to share and who can search for and contact you.
