Registering a joint venture supplier in SAP Business Network
Article-367352
This resource guide will walk you through the process on how to create a standard account for your joint venture on SAP Business Network to bid on a tender opportunity. Keep in mind that only the lead business in a joint venture can create an account.
Note: The joint venture account must be a separate account from the lead business.
In the examples presented in this guide, ABC Inc. has decided to join with DEF Inc. to create a joint venture and is designated as the lead business. ABC Inc. is the lead company of the joint venture.
On this page:
Create your account
Follow the instructions below to create an SAP Business Network account for your joint venture.
Step 1
First, create a new account by following the instructions in the Create your account section of the guide “Registering on and logging in to SAP Ariba: A guide for businesses.”
While creating your account, in the Company name field, enter the name of the joint venture in the following format: Lead legal name, constituent number two legal name, constituent number three legal name, etc. in joint venture. For example, a joint venture legal name would be “ABC Inc., DEF Inc., IN JOINT VENTURE.”
Note: The lead business must complete the User account information section. If you already have another account, use a different username for this joint venture account. Using a fictitious generic email address in the Username field is recommended as it can’t be changed.
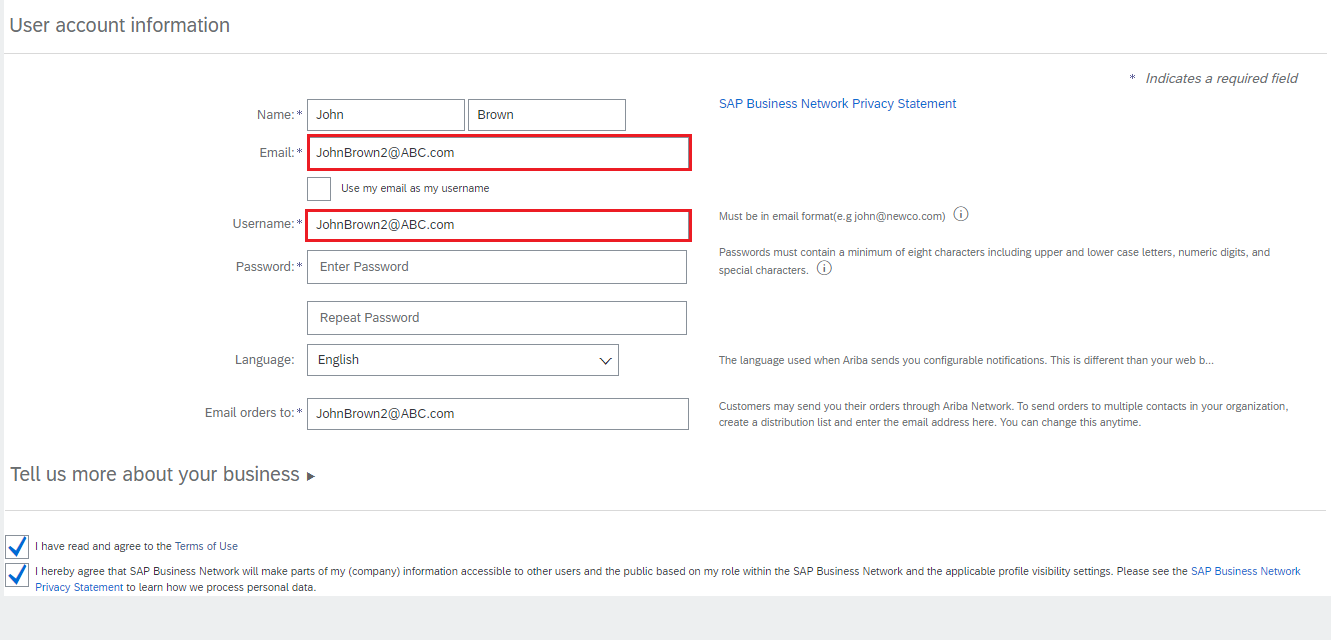
Step 2
Once your account is created, you will receive an activation message at the email address you indicated during registration. Open this email and click the "Activate" link to confirm your email address. Once your account is activated, you will need to log in to your new account to complete the Government of Canada’s required questionnaire. The questionnaire should automatically pop-up, but if not, go to Step 3.
Step 3
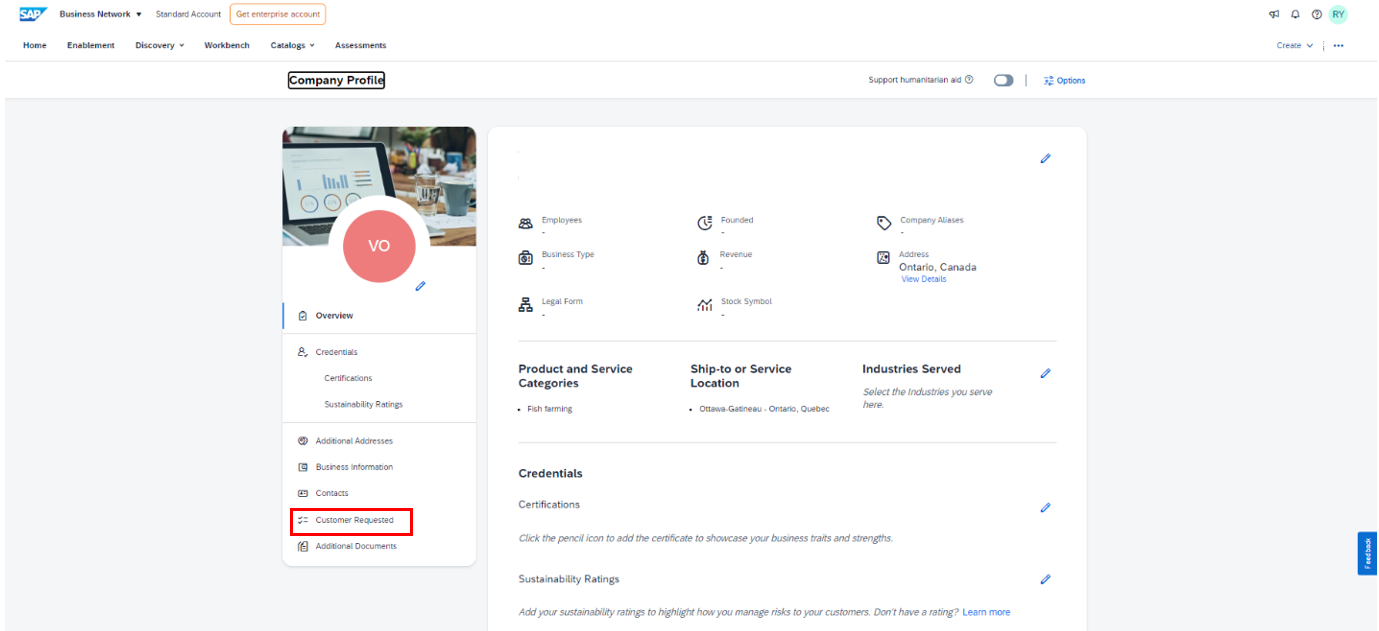
To access the questionnaire, log in to SAP Business Network. Click the circle icon with your initials on it in the top right corner of the page and select the Company Profile option from the menu.
If you need help doing this, refer to the resource guide on registering and logging in to SAP Ariba.

Step 4
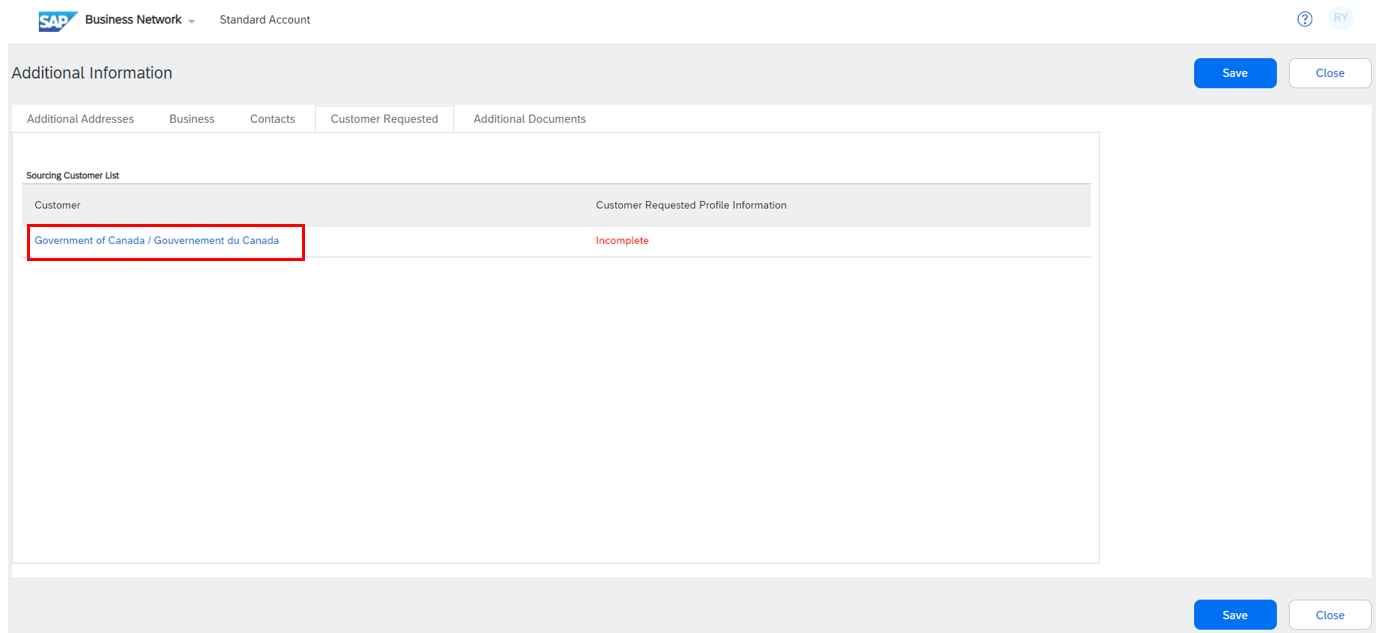
Next, click the “Customer Requested” tab and under the Sourcing Customer list, click the "Government of Canada / Gouvernement du Canada" link to access the questionnaire. Questions 3 to 8 are required to submit a bid and question 9 is mandatory to complete your registration.
Refer to the steps in the Complete these questions to bid section of the guide “Registering on and logging in to SAP Ariba: A guide for businesses.”
If you need help with any of the questions, contact the CanadaBuys Service Desk.
Step 5
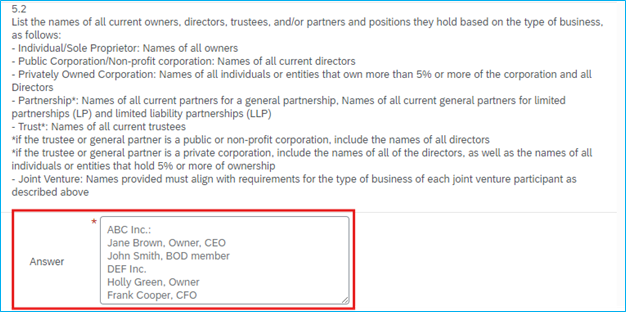
Once you reach question 5 – Integrity Regime, choose “Joint Venture” as your business type for question 5.1. For question 5.2, enter the names of all current owners, directors, trustees, and partners of the joint venture and the positions they hold in the text box provided, starting with the lead business. Add the business name above each list of the individuals names.

Step 6
Next, enter the legal names of all of the businesses that are a part of the joint venture in question 5.3, starting with the lead business. Add each name on a separate line.

Step 7
Then for question 5.4, enter the business numbers of each business, starting with the lead business. Add each number on a separate line.

Step 8
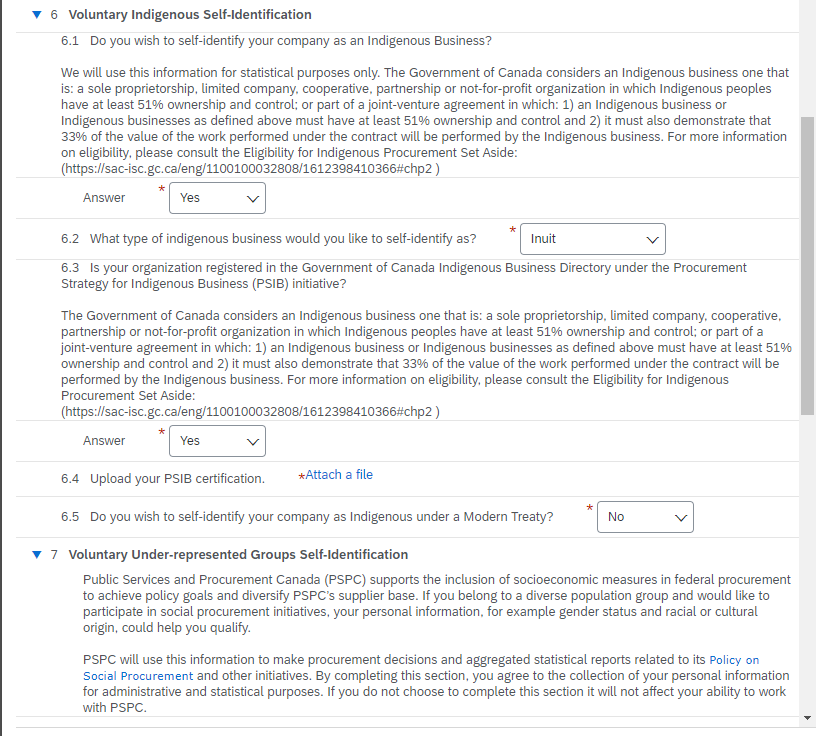
You will need to provide the status of the joint venture and not just the lead business if you would like to answer:
- question 6 – Voluntary Indigenous Self-Identification
- question 7 – Voluntary Under-Represented Groups Self-Identification
- question 8 – Environment Considerations
Enter payment information
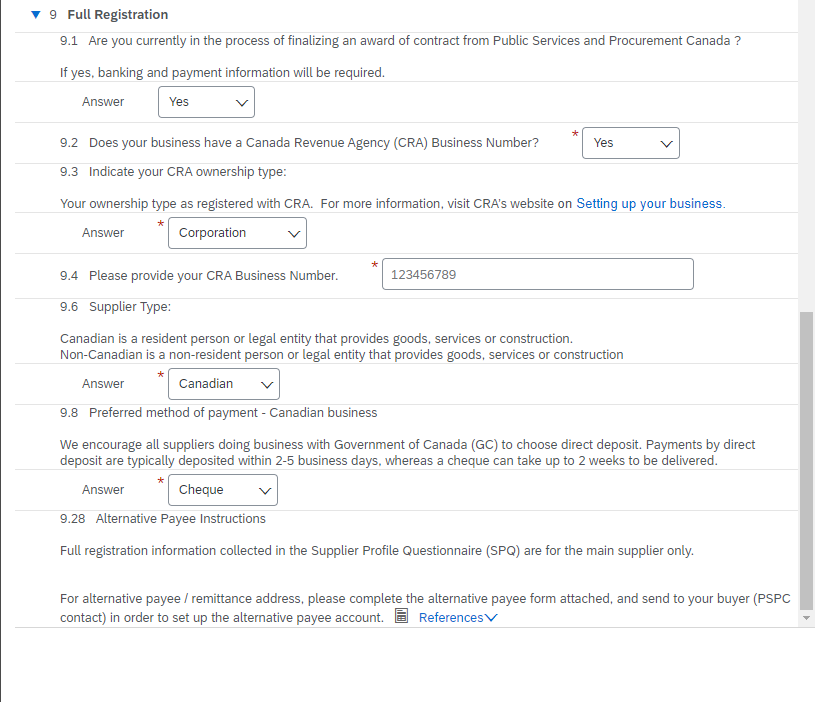
To be awarded a contract by the Government of Canada, you will need to enter your CRA business number and payment information into your SAP Business Network account. To do so, fill out the final section of the questionnaire by following the steps in the "Entering your payment information in SAP Ariba" guide.
Note: Please answer “yes” to question 9.1 to provide the business number of the lead business in the joint venture for question 9.4. Once complete, please contact the CanadaBuys Service Desk to have your business number validated.
Fill in details about the joint venture
After registering on SAP Business Network and completing the questionnaire, you can add basic information to your company profile.
Step 1
By following the steps in the Set up your company profile section of the guide, “Registering on and logging in to SAP Ariba: A guide for businesses,” you can fill in the information required for your company contact, number of employees and all additional address locations. Filling out the Business Information, Marketing and Additional Documents tabs is not required.
