Entering your financial information in SAP Business Network
Article-302338
This resource guide will walk you through how to add financial information and Canada Revenue Agency (CRA) business number to your SAP Business Network account.
Don't already have an account? Refer to the guide on registering and logging in to SAP Business Network.
Fill out the final section of the questionnaire
To enter your financial information, you’ll need to fill out question 9 of the Government of Canada’s questionnaire in SAP Business Network following the steps below.
The CRA business number of your organization will be required under question 9.4 once you select "yes" to question 9.1. This is a mandatory requirement to validate your CRA business number and complete your registration. If you have questions or need help filling out this information, contact the CanadaBuys Service Desk.
Step 1
Log in to SAP Business Network. If you need help doing this, refer to the guide on registering and logging in to your account.
Step 2
You will be brought to the SAP Business Network Home page. From there, click on the circle with your initials in it at the top-right of the page and select "Company Profile" option from the drop-down menu. 
Step 3
Next, click the "Customer Requested" tab. Under the Sourcing customer list, click the "Government of Canada / Gouvernement du Canada" link to access the questionnaire. 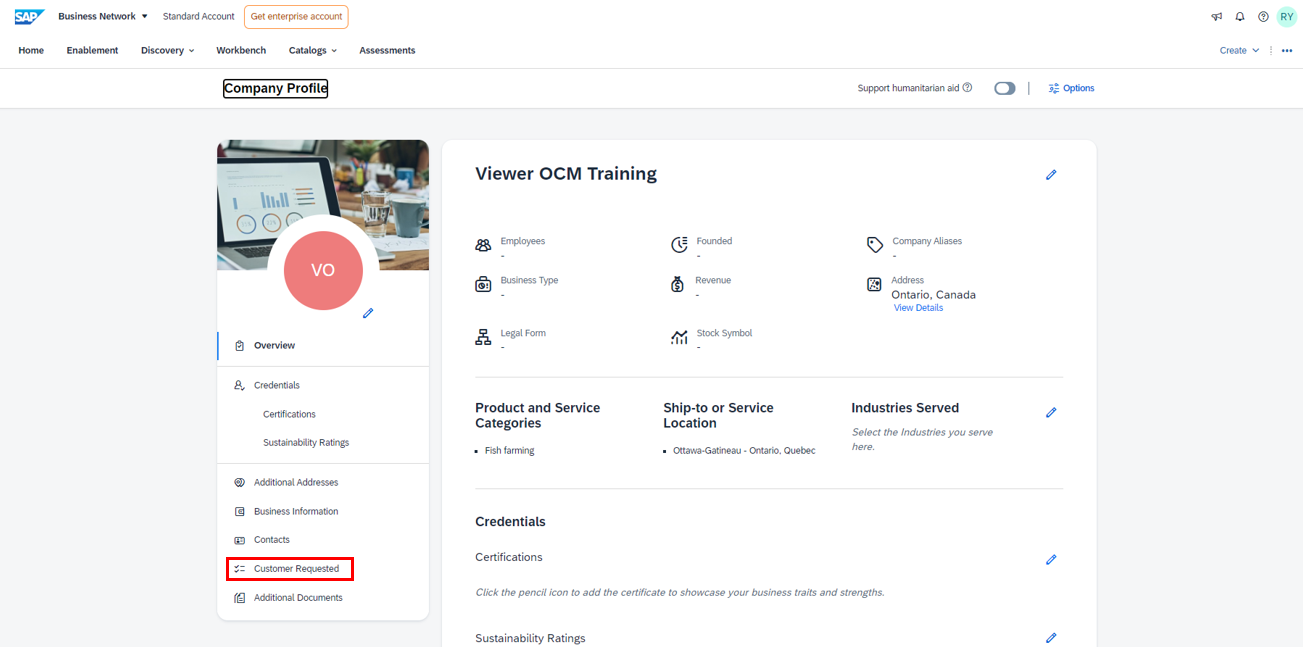
Step 4
The questionnaire will open in a pop-up window. If you already completed the first part of the questionnaire, scroll down to question 9 to begin entering your financial information.
Step 5
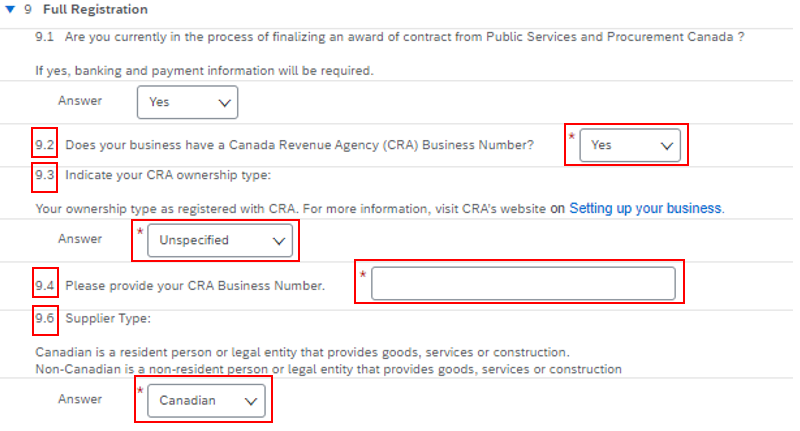
Starting with question 9.1, please select "yes" from the drop-down menu to validate your CRA business number and complete your registration.
Note: If you operate a Canadian business and don’t have a CRA business number, register for one using the Business Registration Online service. If you are a non-Canadian business, register using the Non-Resident Business Number and Account Registration Web Form.
Step 6
For question 9.2, indicate if your business has a CRA business number, and answer the following three questions:
- In question 9.3, indicate the CRA ownership type from the drop-down menu
- In question 9.4, enter your CRA business number
- In question 9.6, indicate the supplier type from the drop-down menu, and depending on your response, complete all corresponding questions, such as country, method of payment, and banking information:
- if you select Canadian, you will be asked to answer steps 7 to 9
- if you select non-Canadian, skip to steps 10 to 13
Step 7: For Canadian suppliers
Next, respond to question 9.8 by selecting the method of payment "Direct Deposit" from the drop-down menu.
Note: Only direct deposit is accepted by the Government of Canada.

Step 8
Fill out the following information:
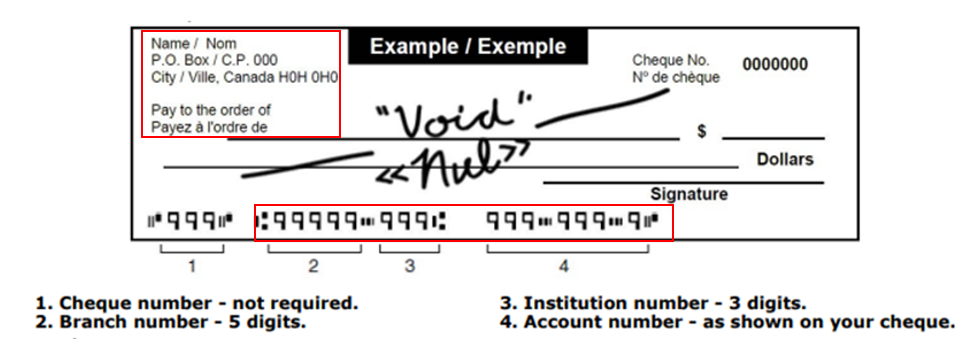
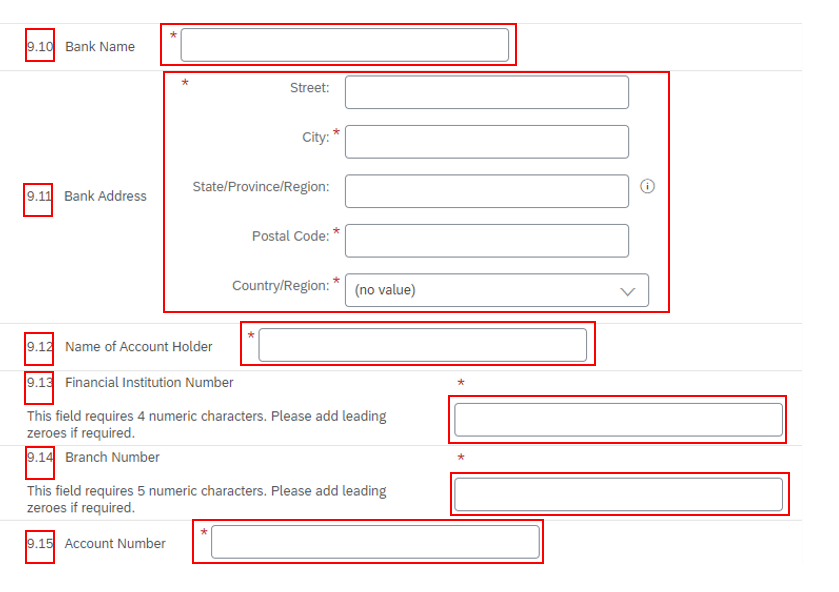
- In questions 9.10 and 9.11, enter the bank name and address, including its city, postal code, and country
- In questions 9.12 to 9.15, enter the name of the account holder, the Financial Institution Number, the branch number and the account number
Step 9
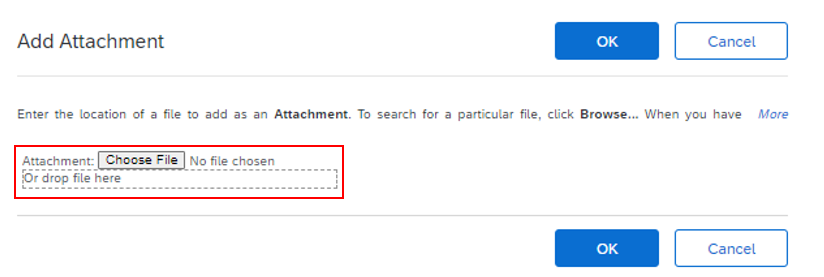
In question 9.16, upload a copy of a void cheque or a bank confirmation letter. Click on the "Attach a file" link to open the Add attachment box. (If you see a blank screen scroll up). Click the “Browse” button to look for the file on your computer. Select your file and click “Open.” The selected file will show in the box. To attach the file, click "OK" at the top-right of the screen.
Now skip to Step 14. 
Step 10: For non-Canadian suppliers
Respond to question 9.7 by selecting the country code in which your entity is located. Click the reference document to verify your country code. Once you find the correct code, enter the two letter code in the answer field.

Step 11
Next, respond to question 9.9 by selecting the method of payment as Wire from the drop-down menu.
Note: Only Wire transfer is accepted by the Government of Canada.

Step 12
Fill out the following information:
- In questions 9.17 and 9.18, enter the bank name and address, including its city, postal code, and country.
- In questions 9.19, 9.20 and 9.23, enter the name of the account holder, the BIC/SWIFT code, and the account number.
- At question 9.26, enter the wire instructions

Step 13
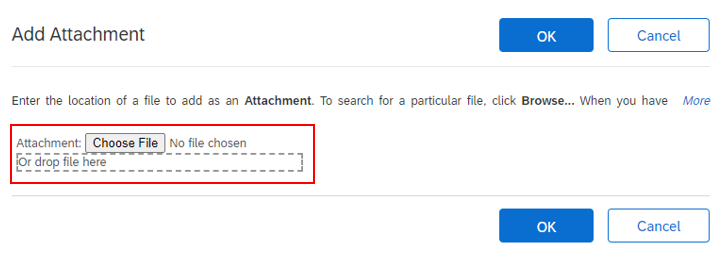
In question 9.27, upload a copy of a void cheque or a confirmation letter from your bank containing the wire banking information. Click the "Attach a file" link to open the Add attachment box. If you see a blank screen, scroll up. Click the "Browse" button to look for the file on your computer. Select your file and click "Open." The selected file will show in the box. To attach the file, click "OK" at the top-right of the screen.

Step 14
When you are finished filling out all the required information in the questionnaire, click the "Save as draft" button at the bottom-right of the page. A message will appear at the top of the page stating that your changes have been saved.
Note: If any information is incomplete, a red banner will appear at the top of the page indicating the problem. You will have to fix those problems before proceeding.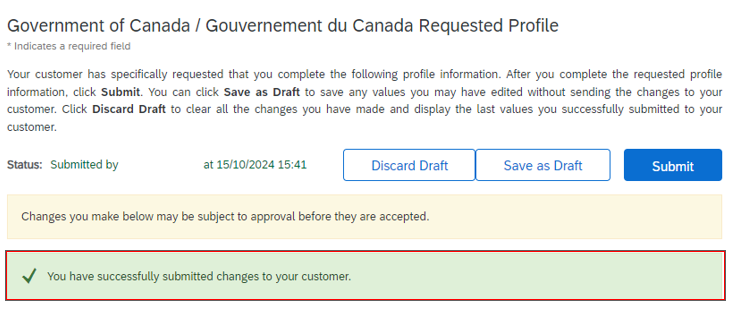
Step 15
Finally, click the "Submit" button at the top-right or bottom-right of the page. A confirmation message will appear indicating that you have successfully submitted your information to the Government of Canada.
Note: If your business was awarded a contract through SAP Business Network without your registration being fully completed, the contracting authority will notify you when you need to fill out the payment section.
Tip: If you ever need to update your financial information, you can follow the same instructions above to go back and change your answers in the questionnaire.
Step 16
If you are in the process of registering your business on SAP Business Network, go to the next steps in the guide: Registering on and logging in to SAP Business Network: A guide for businesses.

