
Adding users and assigning roles in your business’s SAP Ariba account
Article-338057
This resource guide will walk you through, as an account administrator, how to create roles in your SAP Ariba business profile, as well as how to assign users to those roles. While only one account can be created per business number, you can add up to 250 users to your business profile, with assigned roles to limit or maximize their account access. This means if multiple individuals in your business want to participate in bids with the Government of Canada, you can easily add them as users.
On this page:
Create a role
To add new users to your business’s SAP Ariba account, you must first create at least one role. You can assign multiple users to the same role or create a separate role for each user. To create a role, follow these steps.
Step 1
Log in to SAP Ariba. If you need help doing this, refer to the article on registering and logging in to SAP Ariba.
Step 2
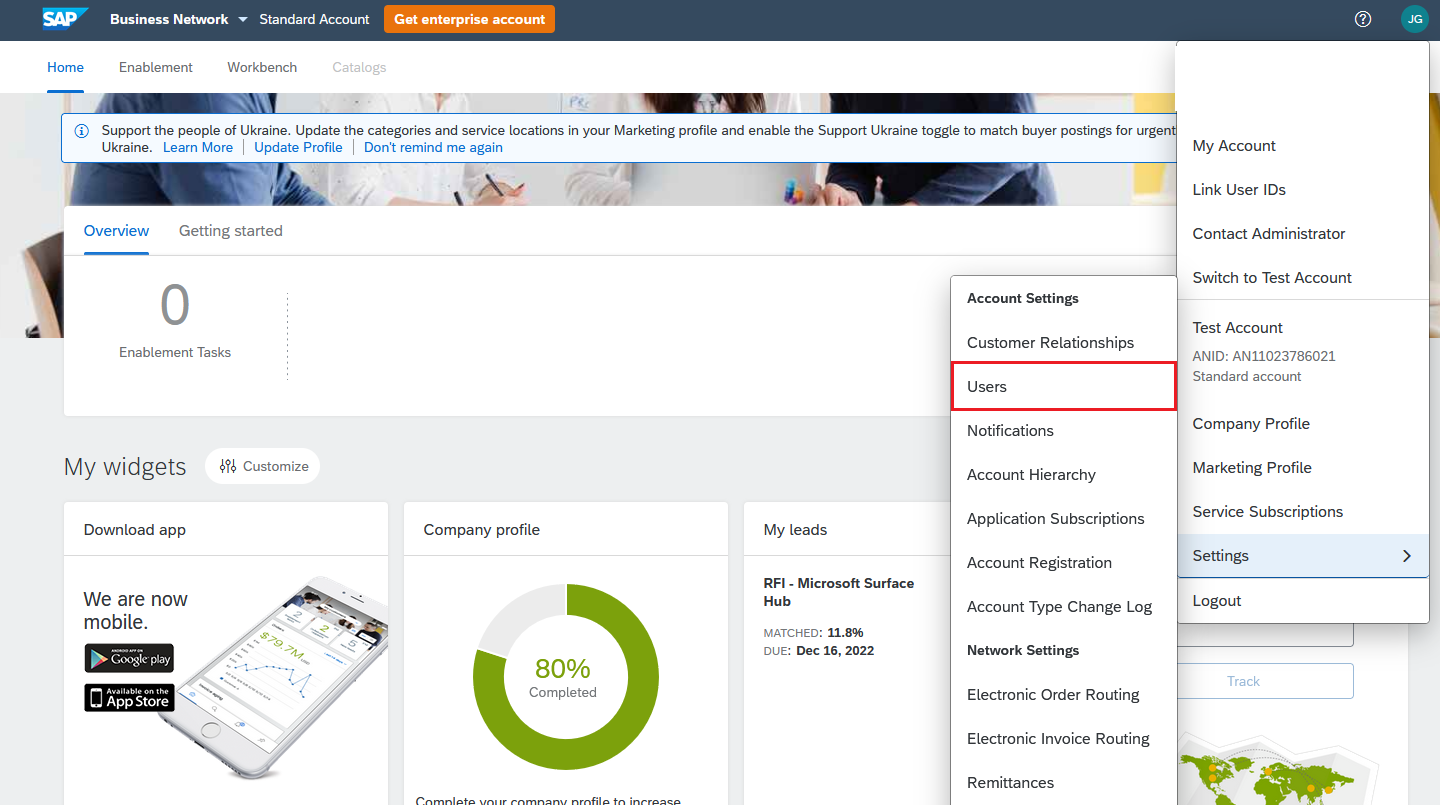
You will be brought to the SAP Ariba Home page. From there, click the circle with your initials in it at the top-right of the page and select “Settings,” then click “Users” in the Account Settings drop-down menu.
Step 3
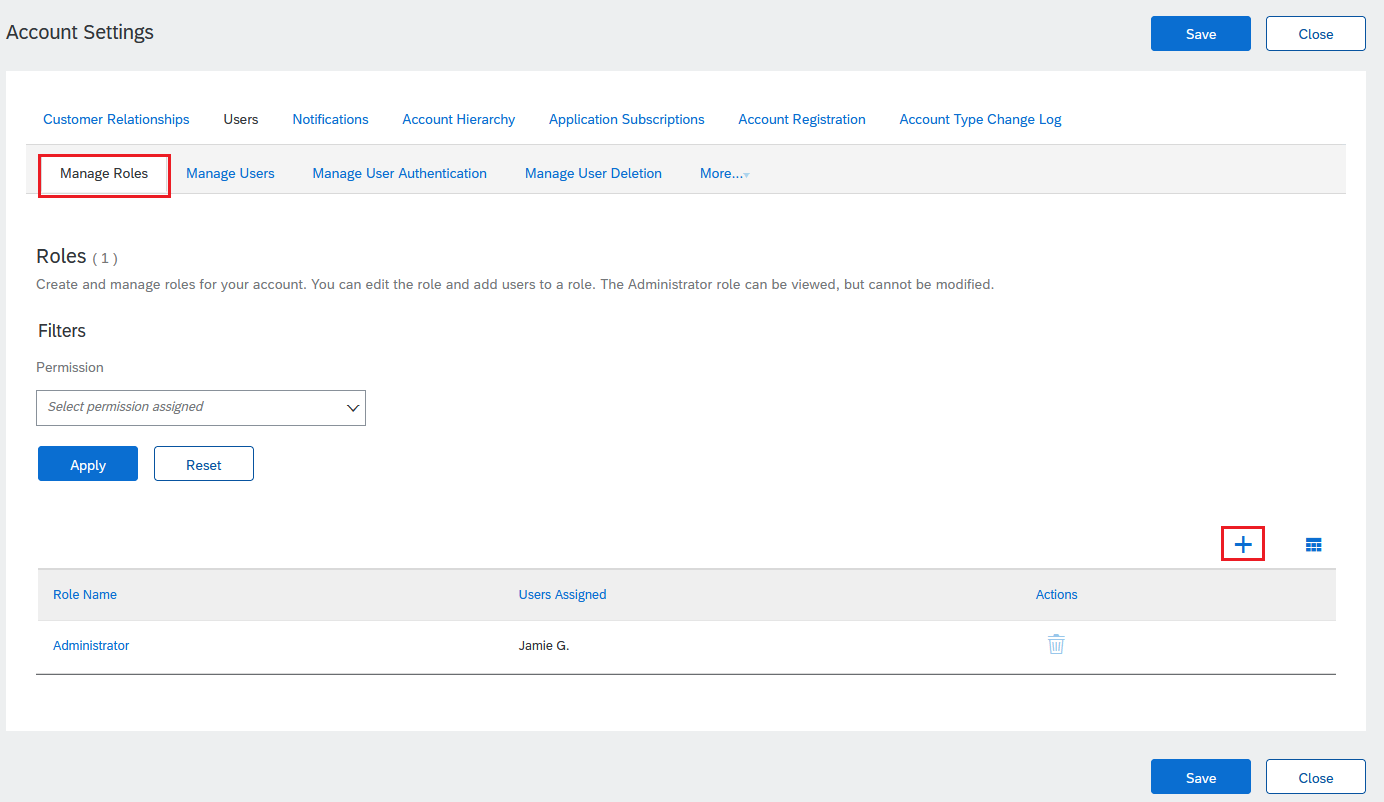
You will be brought to the Users settings page, with the Manage Roles tab open by default. Under this tab, click the “plus” icon.
Step 4
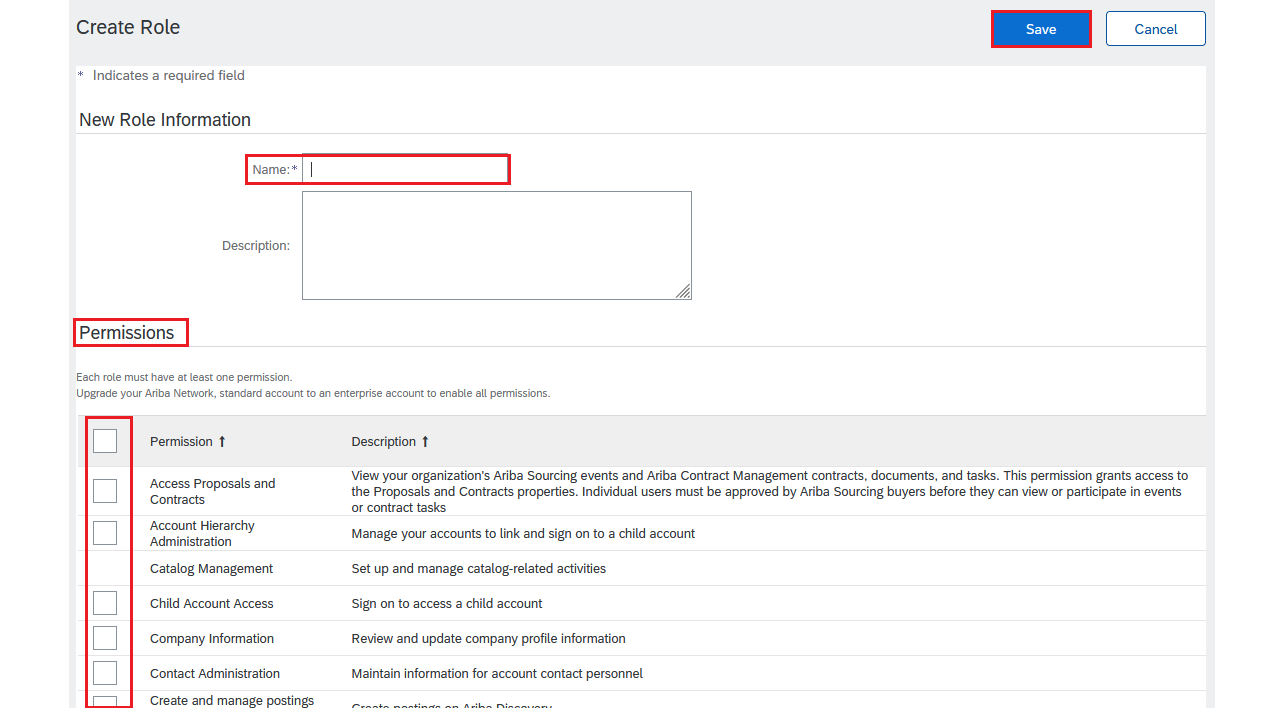
Enter a name for the new role in the Name field. Then, select what level of access you want the role to have by clicking the checkbox on the left hand side of each permission you want to add. The available permissions include:
- Access proposals and contracts
- Account hierarchy administration
- Catalog management
- Child account access
- Company information
Once you’re done choosing the permissions for the new role, click the “Save” button.
Note: Each role must have a least one permission.
Add a user
Once you’ve created a new user role in your SAP Ariba account, you can begin adding users under that role. To add a new user, follow these steps.
Step 1
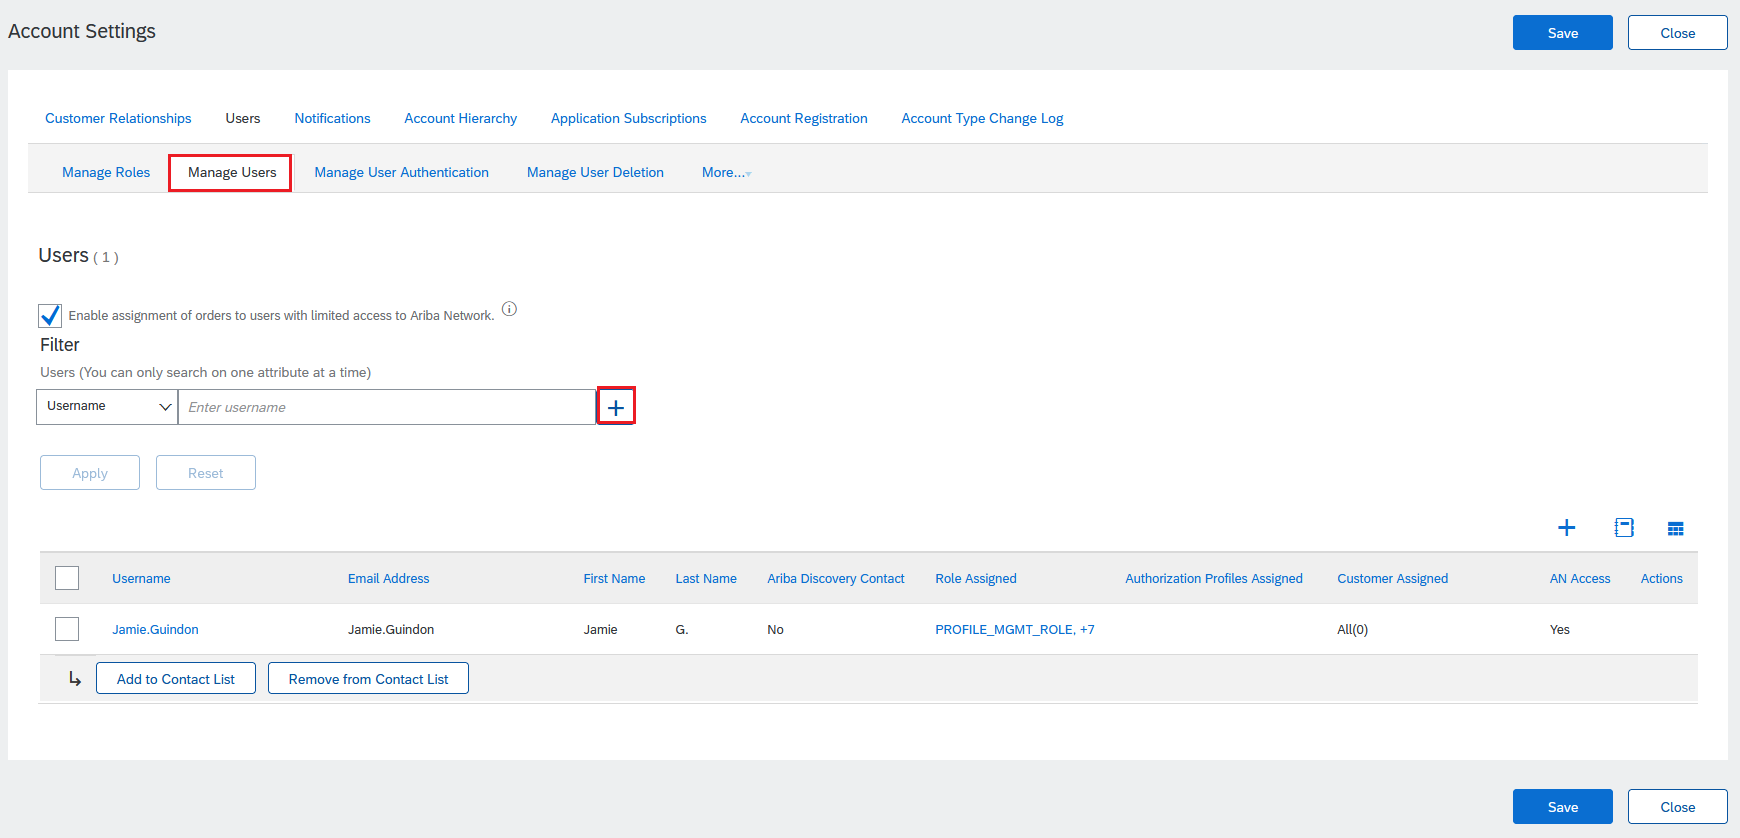
Repeat Step 2 of the Create a role section to access the Users settings page. Then, click on the “Manage Users” tab.
Step 2
Under the Users section, click the “plus” icon next to the Username field to begin adding the new user.
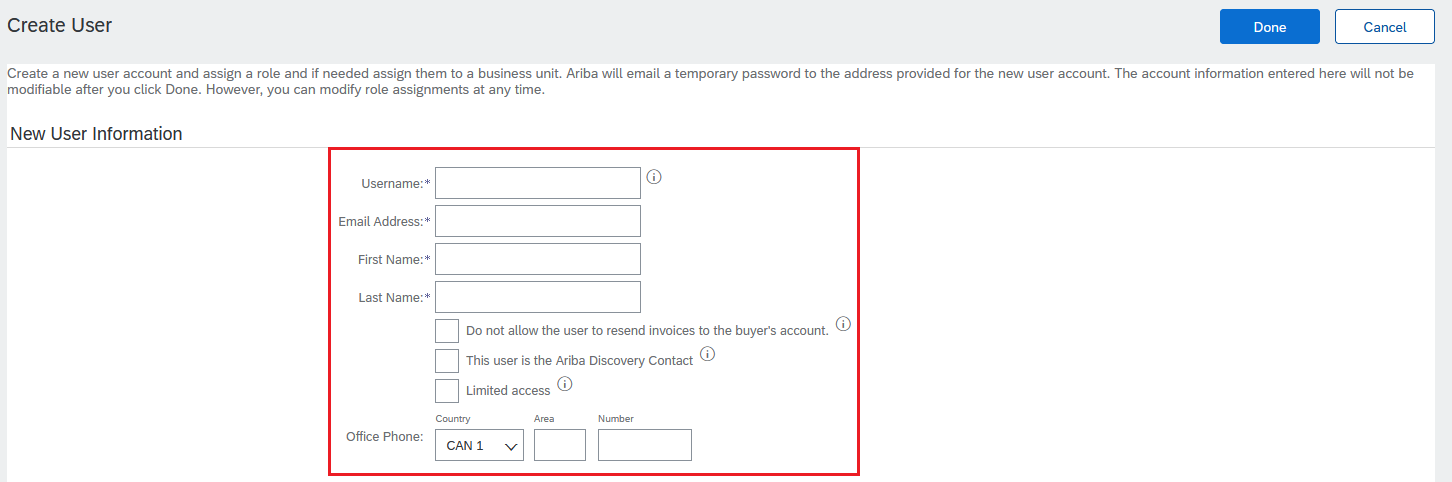
Step 3
Once the Create User page opens, enter the user’s information, including a username, email address, first name, last name, and phone number in the fields provided.
Note: You can use a shared inbox or individual email when creating the user’s account.
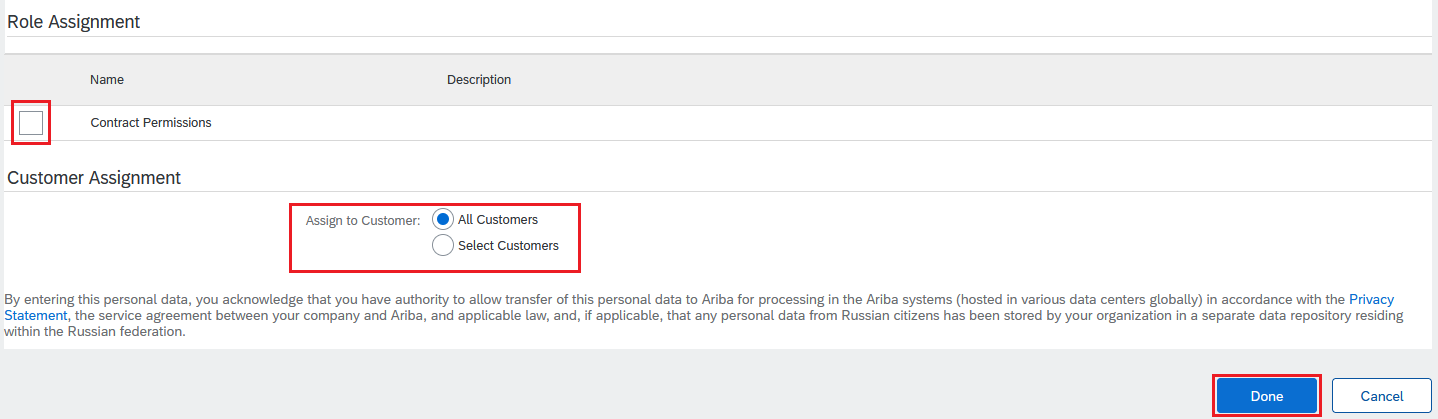
Step 4
Then, select a role in the Role Assignment section by clicking the checkbox to the left of the appropriate role name. Finally, assign a customer in the Customer Assignment section by selecting either the "All Customers" or "Select Customers" radio button.
Once you’re done creating the new user, click the “Done” button.
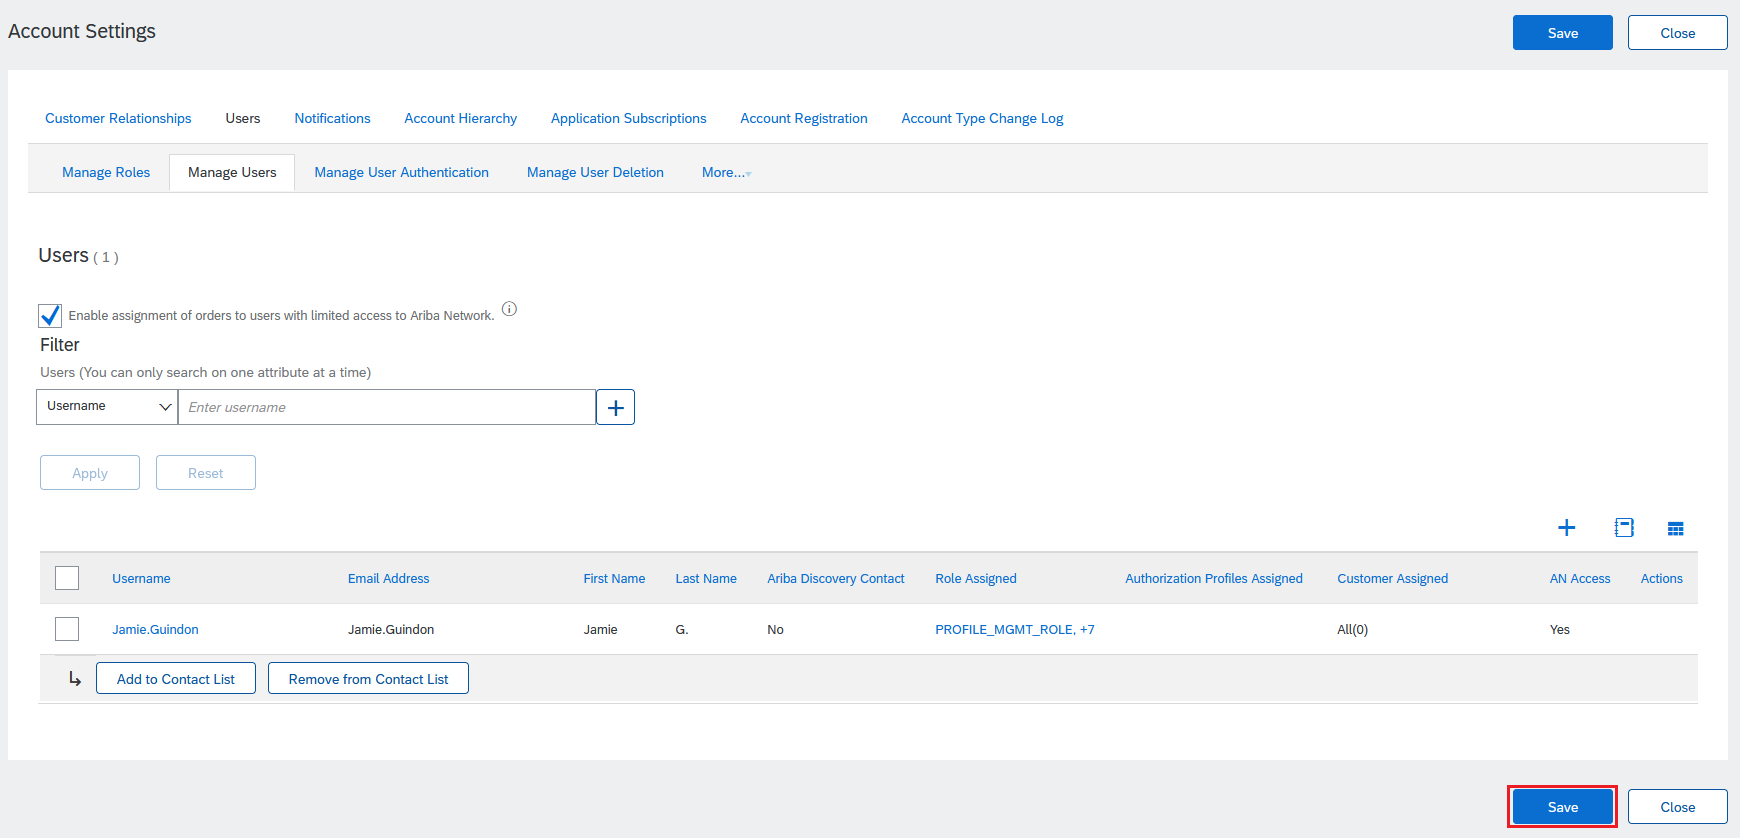
Step 5
You will be brought back to the User settings page. Repeat the steps above to add more users, or if you are finished, click the “Save” button.
After clicking the “Done” button, if you receive an error message instead stating that the user already exists, this means the username you entered in Step 3 is already associated with an Ariba Network, Ariba Discovery, or Ariba Sourcing account. You will need to enter a unique username to register a new user account.
Note: SAP Ariba requires that all usernames be formatted like an email address, but they do not have to be a valid email address. For example, if your username of example@ariba.com was not accepted, you can try using example1@ariba.com.
Step 6
Once you’ve created the new user, they will receive an email with their username and a temporary password. The temporary password will be valid for 24 hours. The new user must access their account and change the password when logging in for the first time.
Step 7
When you are finished, you’ll need to get approval for the users you've added. You can do that by contacting the CanadaBuys Service Desk with your SAP Ariba account number.
