
Updating your SAP Ariba account information and preferences
Article-449
Having up-to-date account information and preferences is key when doing business online. Once you have created an SAP Ariba account, you will be able to edit your account information at any time. In this resource guide, we’ll show you the information you can update in a flash: from changing your password to setting the currency when viewing tender opportunities, and more.
On this page:
- Go to the My Account page
- Update your account information
- Update your preferences
- Update your contact information
- Set your contract information preferences
- Update your company profile
- Change your language setting
Go to the My Account page
You can update your account information, user preferences and contact information from the My Account page. Follow the instructions below to get to that page.
Remember, you can return to the My Account page to update your information at any time, to make sure that your account always has the most recent information.
Step 1
Log in to SAP Ariba. If you need help doing this, refer to the article on registering and logging in to your account.
Step 2
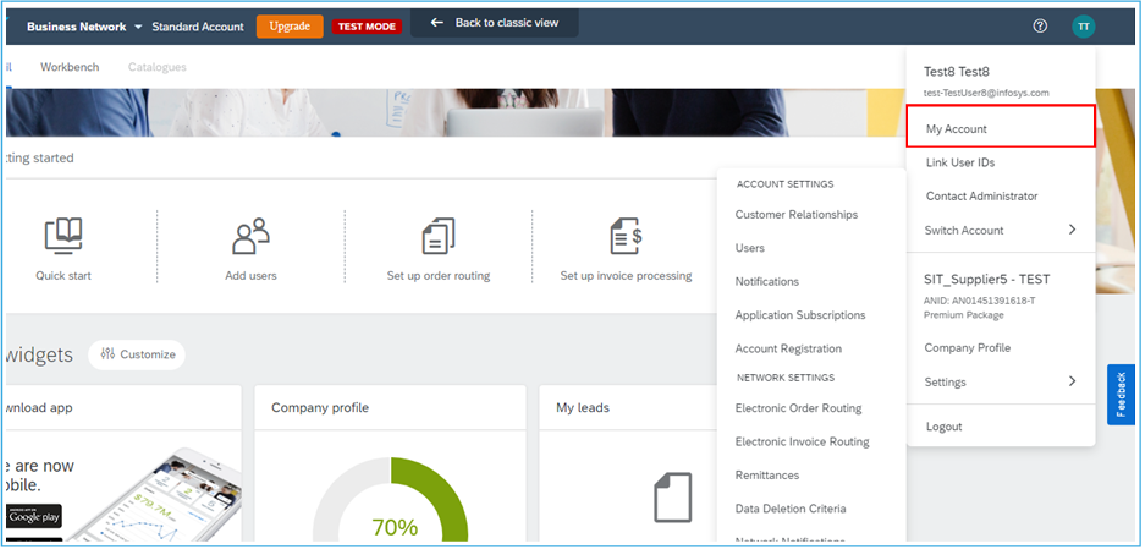
Once you’re logged in, click on the circle with your initials at the top-right of the page. This will open the Account Settings drop-down menu. Then, click on "My Account" in the list provided.
Step 3
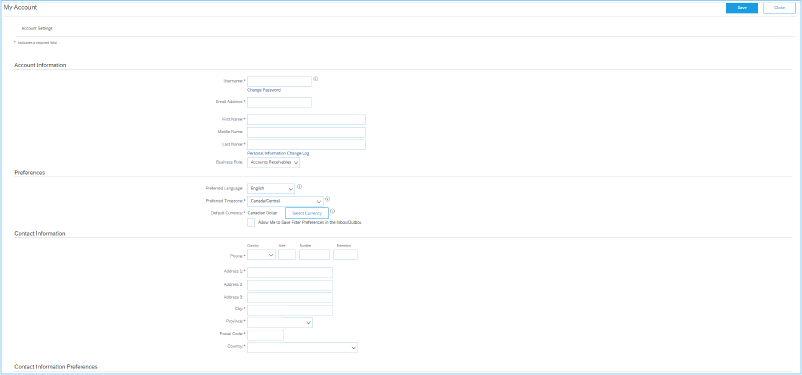
The My Account page is divided into four sections: Account Information, Preferences, Contact Information and Contract Information Preferences. Refer to the other sections of this guide on how to update each one.
Update your account information
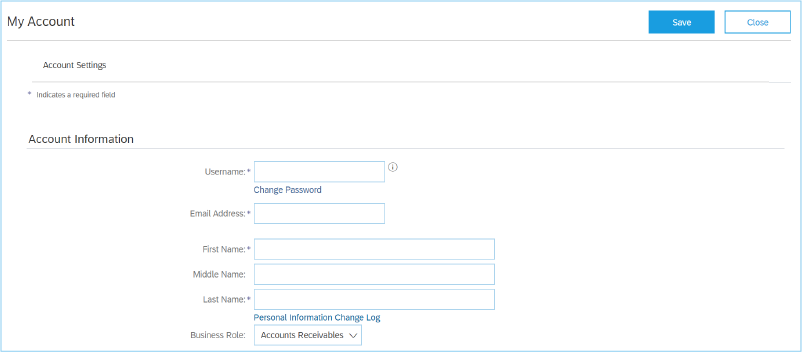
Do you need to update your password or the email address you use to log in to your account? Change this information and more in the Account Information section. In this section, you can update:
- your username (must be in email format)
- your password
- your email address
- your first name, middle name, or last name
- your business role within your company
Follow the instructions below for updating each part of this section and for viewing previous changes made.
Step 1
You can change your username, email address, first name, middle name or last name by entering the updated information in the fields provided under the Account information section.
Step 2
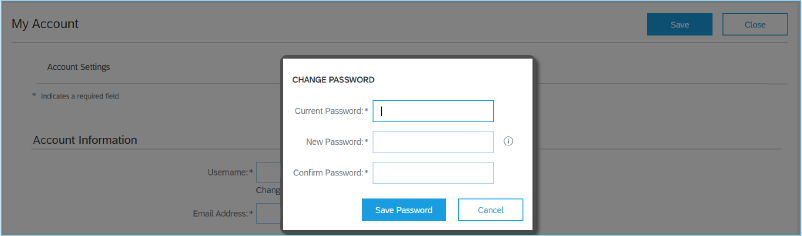
To update your password, click the "Change Password" link under the Username field. This will open the Change Password window.

Step 3
In the Change Password window, enter your current password in the Current Password field. Then, enter your new password in the New Password field and confirm it by entering it once more in the Confirm Password field.
Note: Passwords must have at least eight characters and must contain at least one number. Passwords can contain letters and punctuation marks, and are case sensitive.
Step 4
Once you’ve entered all the necessary information, click the "Save Password" button to save your choice and return to the My Account page.
Step 5
To update your role within your business, scroll down to the Business role field and select the most appropriate option from the drop-down list.
Step 6
If you want to view a list of the personal information that has been updated on your account, click on the "Personal Information Change Log" under the Last Name field. This will bring you to the User Profile Audit Log page where you can see changes to your account’s user profile within a chosen date range.
![]()
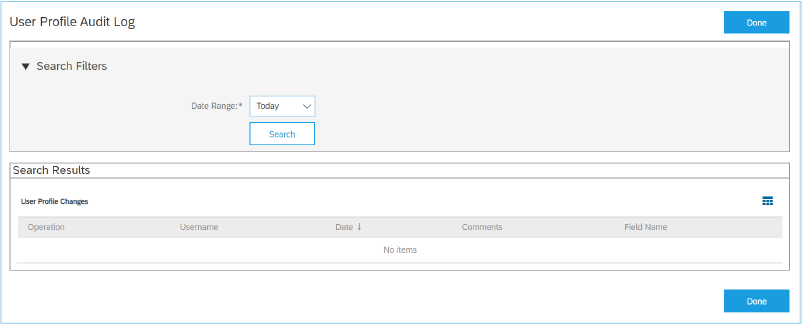
Step 7
When you’ve finished updating your information, click the "Save" button either at the top-right or bottom right corner of the page. You’ll know you successfully saved your choices if a green banner pops up at the top of the page.
Update your preferences
Preferences include receiving important notices in the right language, and setting your time zone to make sure you never miss the time frame to bid. In the Preferences section, you can select:
- the preferred language for notifications
- the preferred time zone for all dates and times displayed for all company account users
- the default currency for the monetary amounts entered and viewed for all company account users
Step 1
Click the drop-down field next to the preference you want to change and select an option from the list.

Step 2
When you’ve finished setting your preferences, click the "Save" button either at the top-right or bottom right corner of the page. You’ll know you successfully saved your choices if a green banner pops up at the top of the page.
Update your contact information
Your contact information changes over time. You move to a new city, you get a new phone number, and sometimes you even change countries. Luckily, as this information changes, you can easily update it in your account.
Step 1
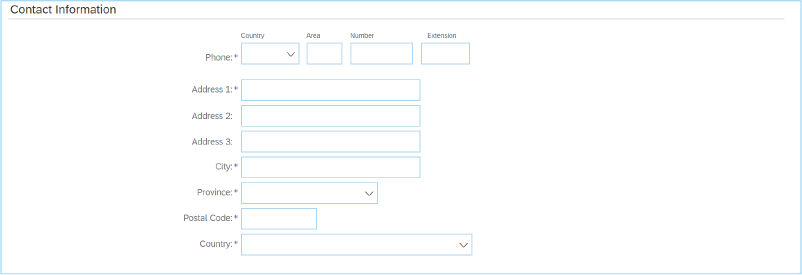
You can update the following information by entering it into the fields provided:
- phone number
- address
- city
- province
- postal code
- country
Step 2
When you’ve finished entering your contact information, click the "Save" button either at the top-right or bottom right corner of the page. You’ll know you successfully saved your choices if a green banner pops up at the top of the page.
Set your contact information preferences
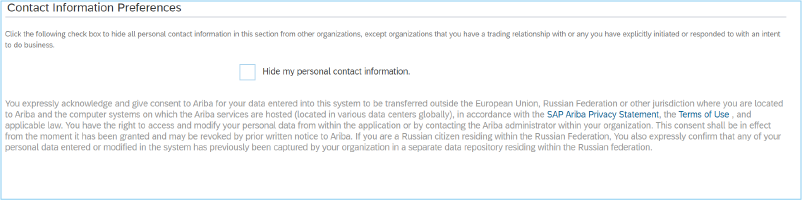
If you want to hide all personal contact information, you can do so in the Contact Information Preferences section by checking the box to the left of "Hide my personal contact information." Your contact information will remain visible to organizations you have done business with or responded to a tender opportunity from. Click the "Save" button either at the top-right or bottom right corner of the page to save this change.
Update your company profile
Follow the steps in this section to make changes to your company profile in SAP Ariba. This includes your business’s address, number of employees and more.
Step 1
Log in to SAP Ariba. If you need help doing this, refer to the guide on registering and logging in to your account.
Step 2
Once you are logged in, click on the circle with your initials in it at the top-right of the page and select "Company Profile" from the drop-down menu.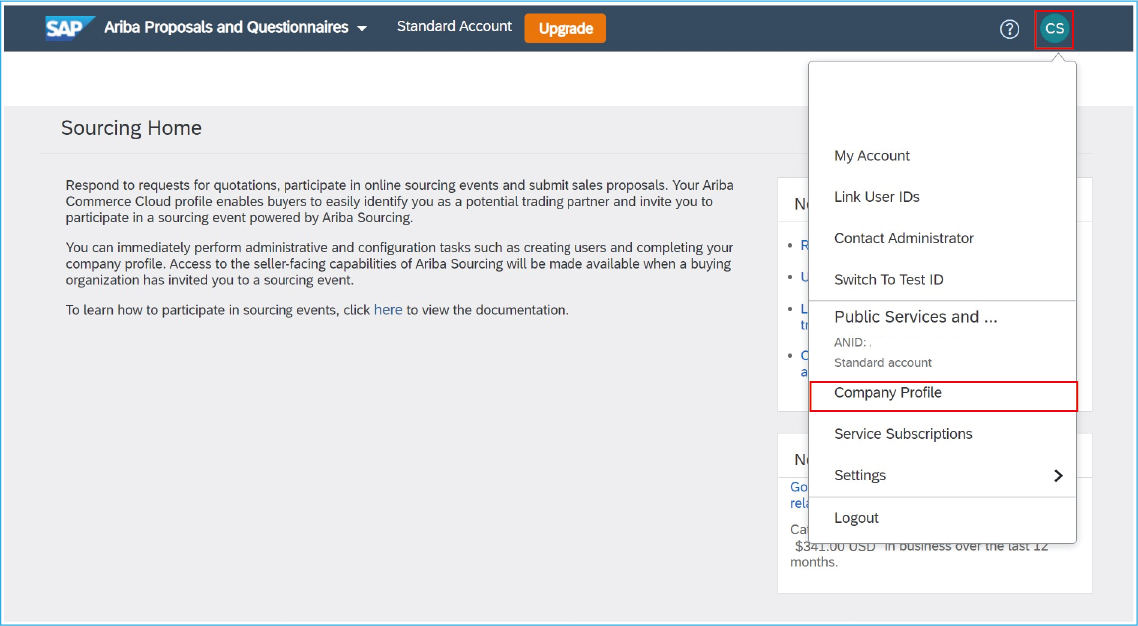
Step 3
The Company profile page is displayed with seven tabs where you can edit parts of your company profile. You can edit your information in the Basic, Business and Contacts tabs. For help filling out fields under these tabs, refer to the Set up your company profile section of Registering on and logging in to SAP Ariba: Guide for business.
Change your language setting
The language that you see content in on SAP Ariba depends on which language your Web browser is set to. For example, if you are using Google Chrome and the browser is set to French, then you will see the site in French. To change your default language, refer to the instructions for your browser:
- For Google Chrome, see the article Change Chrome languages & translate webpages
- For Mozilla Firefox, see the article Choose display languages for multilingual web pages
- For Microsoft Edge, see the article Use Microsoft Edge in another language
- For Safari, see the article Change the language your Mac uses
